Sticky Rice Cakes with Salt-Cured Yolk and Peanut Butter Filling
Does it seem like I went to crazy town with this one? Yes, I made a filling out of salt-cured egg yolks and peanut butter and sweetened it with maple syrup. I stuffed it inside a dough made with glutinous rice flour (aka 'sweet rice flour' not to be confused with 'rice flour'!), coated them in peanut crumble and pan-fried them. They turned out suuper addictive! We could not stop munching on this warm, chewy, salty-sweet snack! So the lunacy was justified...hence I urge you to continue reading. Plus also there's a giveaway I want you to know about :) **GIVEAWAY CLOSED**
I created this recipe in partnership with Zwilling Canada for Chinese (Lunar) New Year, which falls on February 16 this year. Like every holiday, there are traditions centered around food for CNY too, of course! Since a lot of the goodies are off-limits for Aubrie, I took matter into my own hands and made something that my whole family can enjoy. And it being CNY, I was craving for something quintessentially Chinese.
Which brings me back to that salt-cured yolk thing. I was inspired by one of the most epic Chinese dim sum desserts ever. Like ever ever. The Salted Yolk Custard Bun ("Liu Sha Bao" in Chinese). It's the BEST.
If you have had it, then you and I are giving each other a slow, knowing head nod of approval across cyberspace right now. You got me. I know. For everyone else who hasn't yet hit Ctrl + W on their keyboard to close their browser window on me ;) the salty yolk creates this umami-packed richness that is magic when used in desserts. Who doesn't love a salty-sweet flavor combo?
I will call out, the salt-cured yolks require some advance thinking - 4 days to be exact - for the yolks to cure in a simple mixture of kosher salt and granulated sugar.* I used Bon Appetit's cured egg yolk recipe, stopping short of the dehydration step to keep it softer. The majority of the time is passive in the fridge, and totally worth the wait. *By the way, the sugar used to cure the yolks is rinsed off at the end of curing, hence I deem this recipe still refined sugar-free.
The main ingredients in the Salted Yolk Custard Bao are salted egg yolk (usually the brined version which takes more than a month to make!), sugar, milk powder and a shameful amount of butter. It's mega sinful! But if you know me at all, I love swapping in healthier substitutes to make guilty pleasures a little less guilty. My filling is made with salt-cured egg yolks, peanut butter and maple syrup. That's it! And instead of stuffing the filling in a wheat flour bao, I went with a glutinous rice dough, which contrary to the name, is made from rice and actually has no gluten in it. This means (not by coincidence), this CNY treat is gluten-free, dairy-free and refined-sugar-free!
The other upside with this dough is that it is dead easy to make, requiring simply glutinous rice flour plus water mixed together by hand. Yippee! I think this makes up for the waiting time on the cured yolk so we'll just call it even. Ready for an incredible snack (er...in four days time)? Scroll down for the full recipe.
Meanwhile, there's also that amazing Zwilling giveaway for you to enter ... scroll scroll ...
** GIVEAWAY CLOSED**
ZWILLING GIVEAWAY! ** (scroll down for sticky rice cake recipe)
Besides giving you this new recipe, in partnership with Zwilling Canada I am also giving away a Zwilling 12.5" Wok + Steamer (pictured below) and 2-pair set of Zwilling Chopsticks to one lucky winner on Instagram! I used both the wok and the steamer in this recipe. This is quality cookware. Key to all good cookware is a sturdy construction and a heavy bottom that evenly distributes heat. This Zwilling wok / steamer delivers on that plus it is gorgeously designed to boot! Keep an eye out for the giveaway announcement later today on my Instagram @saltnpepperhere and follow the simply entry instructions in the post. Open to all residents of Canada. ONE WINNER will be announced via my Instagram and contacted by Instagram Direct Message on Thursday, February 15, 2018. Please read full terms and conditions at the end of this blog post.
Sticky Rice Cakes with Salt-Cured Yolk and Peanut Butter Filling
{ gluten-free, dairy-free, refined sugar free }
Recipe makes 16 cakes.
INGREDIENTS
For the salt-cured egg yolks (recipe excerpted from Bon Appétit):
8 large egg yolks
3 1/2 C kosher salt
2 1/2 C granulated sugar
For assembly and pan-frying:
1/2 C peanuts, to make into crumble for coating
2 tbsp oil (I use coconut oil)
For the filling (makes ~ 1 1/3 cup):
8 salt-cured yolks, from above
1/2 C unsalted peanut butter (well-stirred)
2/3 C pure maple syrup
For the glutinous rice cake dough:
1 1/3 C glutinous rice flour (aka 'sweet rice flour', not to be confused with 'rice flour') + 1/4 C more glutinous rice flour for dusting on work surface
1/2 C hot water
1/2 C cold water (or a bit more as needed to achieve proper dough texture)
METHOD
Cure the yolks: At least 4 days in advance, cure the egg yolks. Mix the salt and sugar together and empty about half of it in a shallow dish large enough to hold 8 yolks without touching each other. Separate the first yolk from the white. Make an indentation in the salt-sugar mixture using one half of the empty egg shell by pressing the rounded end gently into it. Place the yolk in the dent. Continue with the rest. Once all 8 yolks are nested comfortably, start sprinkling the remaining salt-sugar mixture over them to fully cover. Wrap tightly and chill in the fridge for 4 days. (Egg whites can be used for egg white omelettes, meringues, buttercream, pavlovas like this, etc. or frozen and used later). At the end of 4 days, gently pull out the yolks (they should be shiny and slightly gooey on the outside but pretty firm in the center) and rinse them off gently under water and patted dry. They are ready to be used in this recipe!
Make the peanut crumble coating: Place the peanuts in a blender or food processor. I used my Vitamix blender with the smaller smoothie cup adapter (since it's a small volume) and blended on high level 10 for about 7-8 minutes until it became a fine crumble. Make sure to stop before it turns into peanut butter! If using a food processor, pulse until a fine crumble is achieved. Place in a shallow bowl for rolling the formed sticky rice cakes before frying.
Prepare the filling: Place the cured yolks on a heat-proof dish, and place inside a steamer. Steam them for about 7-8 minutes to soften (you can also microwave to soften, test a couple of minutes at a time until soft enough to mash with a fork). Combine the mashed yolks, peanut butter (make sure it is well-stirred to reincorporate the oil into the peanut butter) and maple syrup in a medium sized bowl. Mash with a fork to completely incorporate into a thick paste. Alternatively you can use an immersion blender like I did to combine (but fork mashed is fine too). Place the bowl of filling into the freezer while you prepare the dough to make it easier to scoop later.
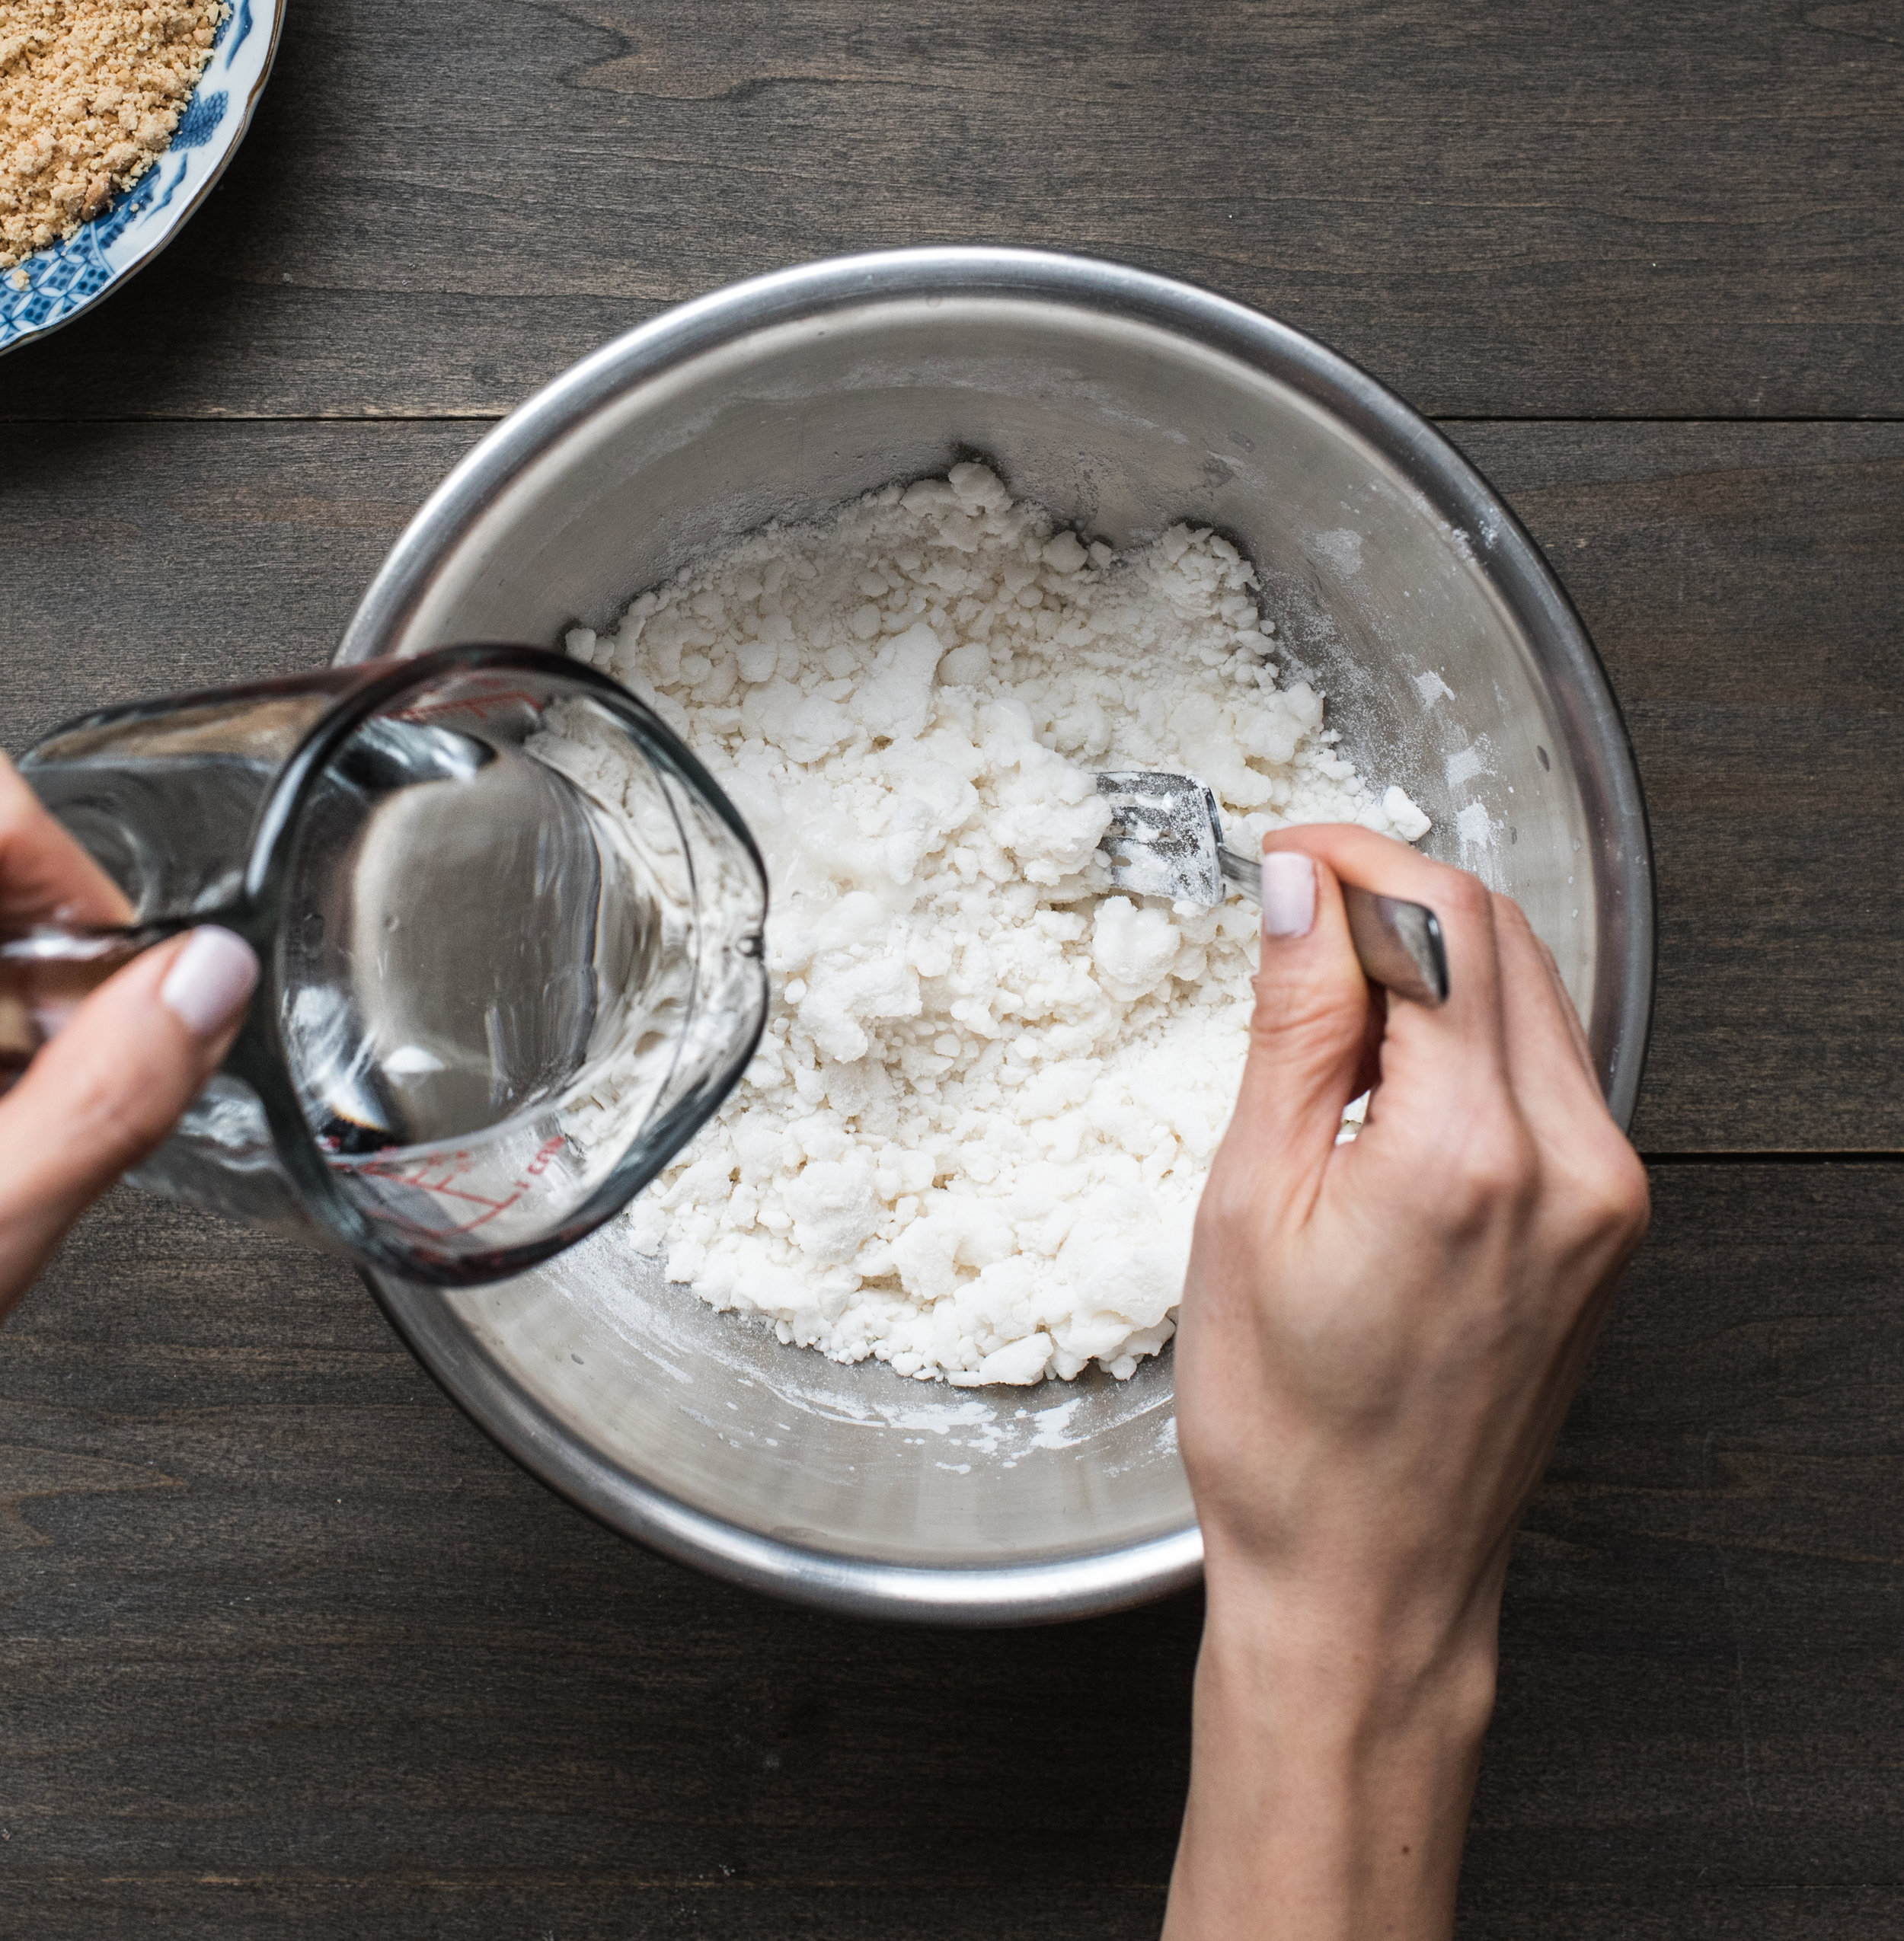
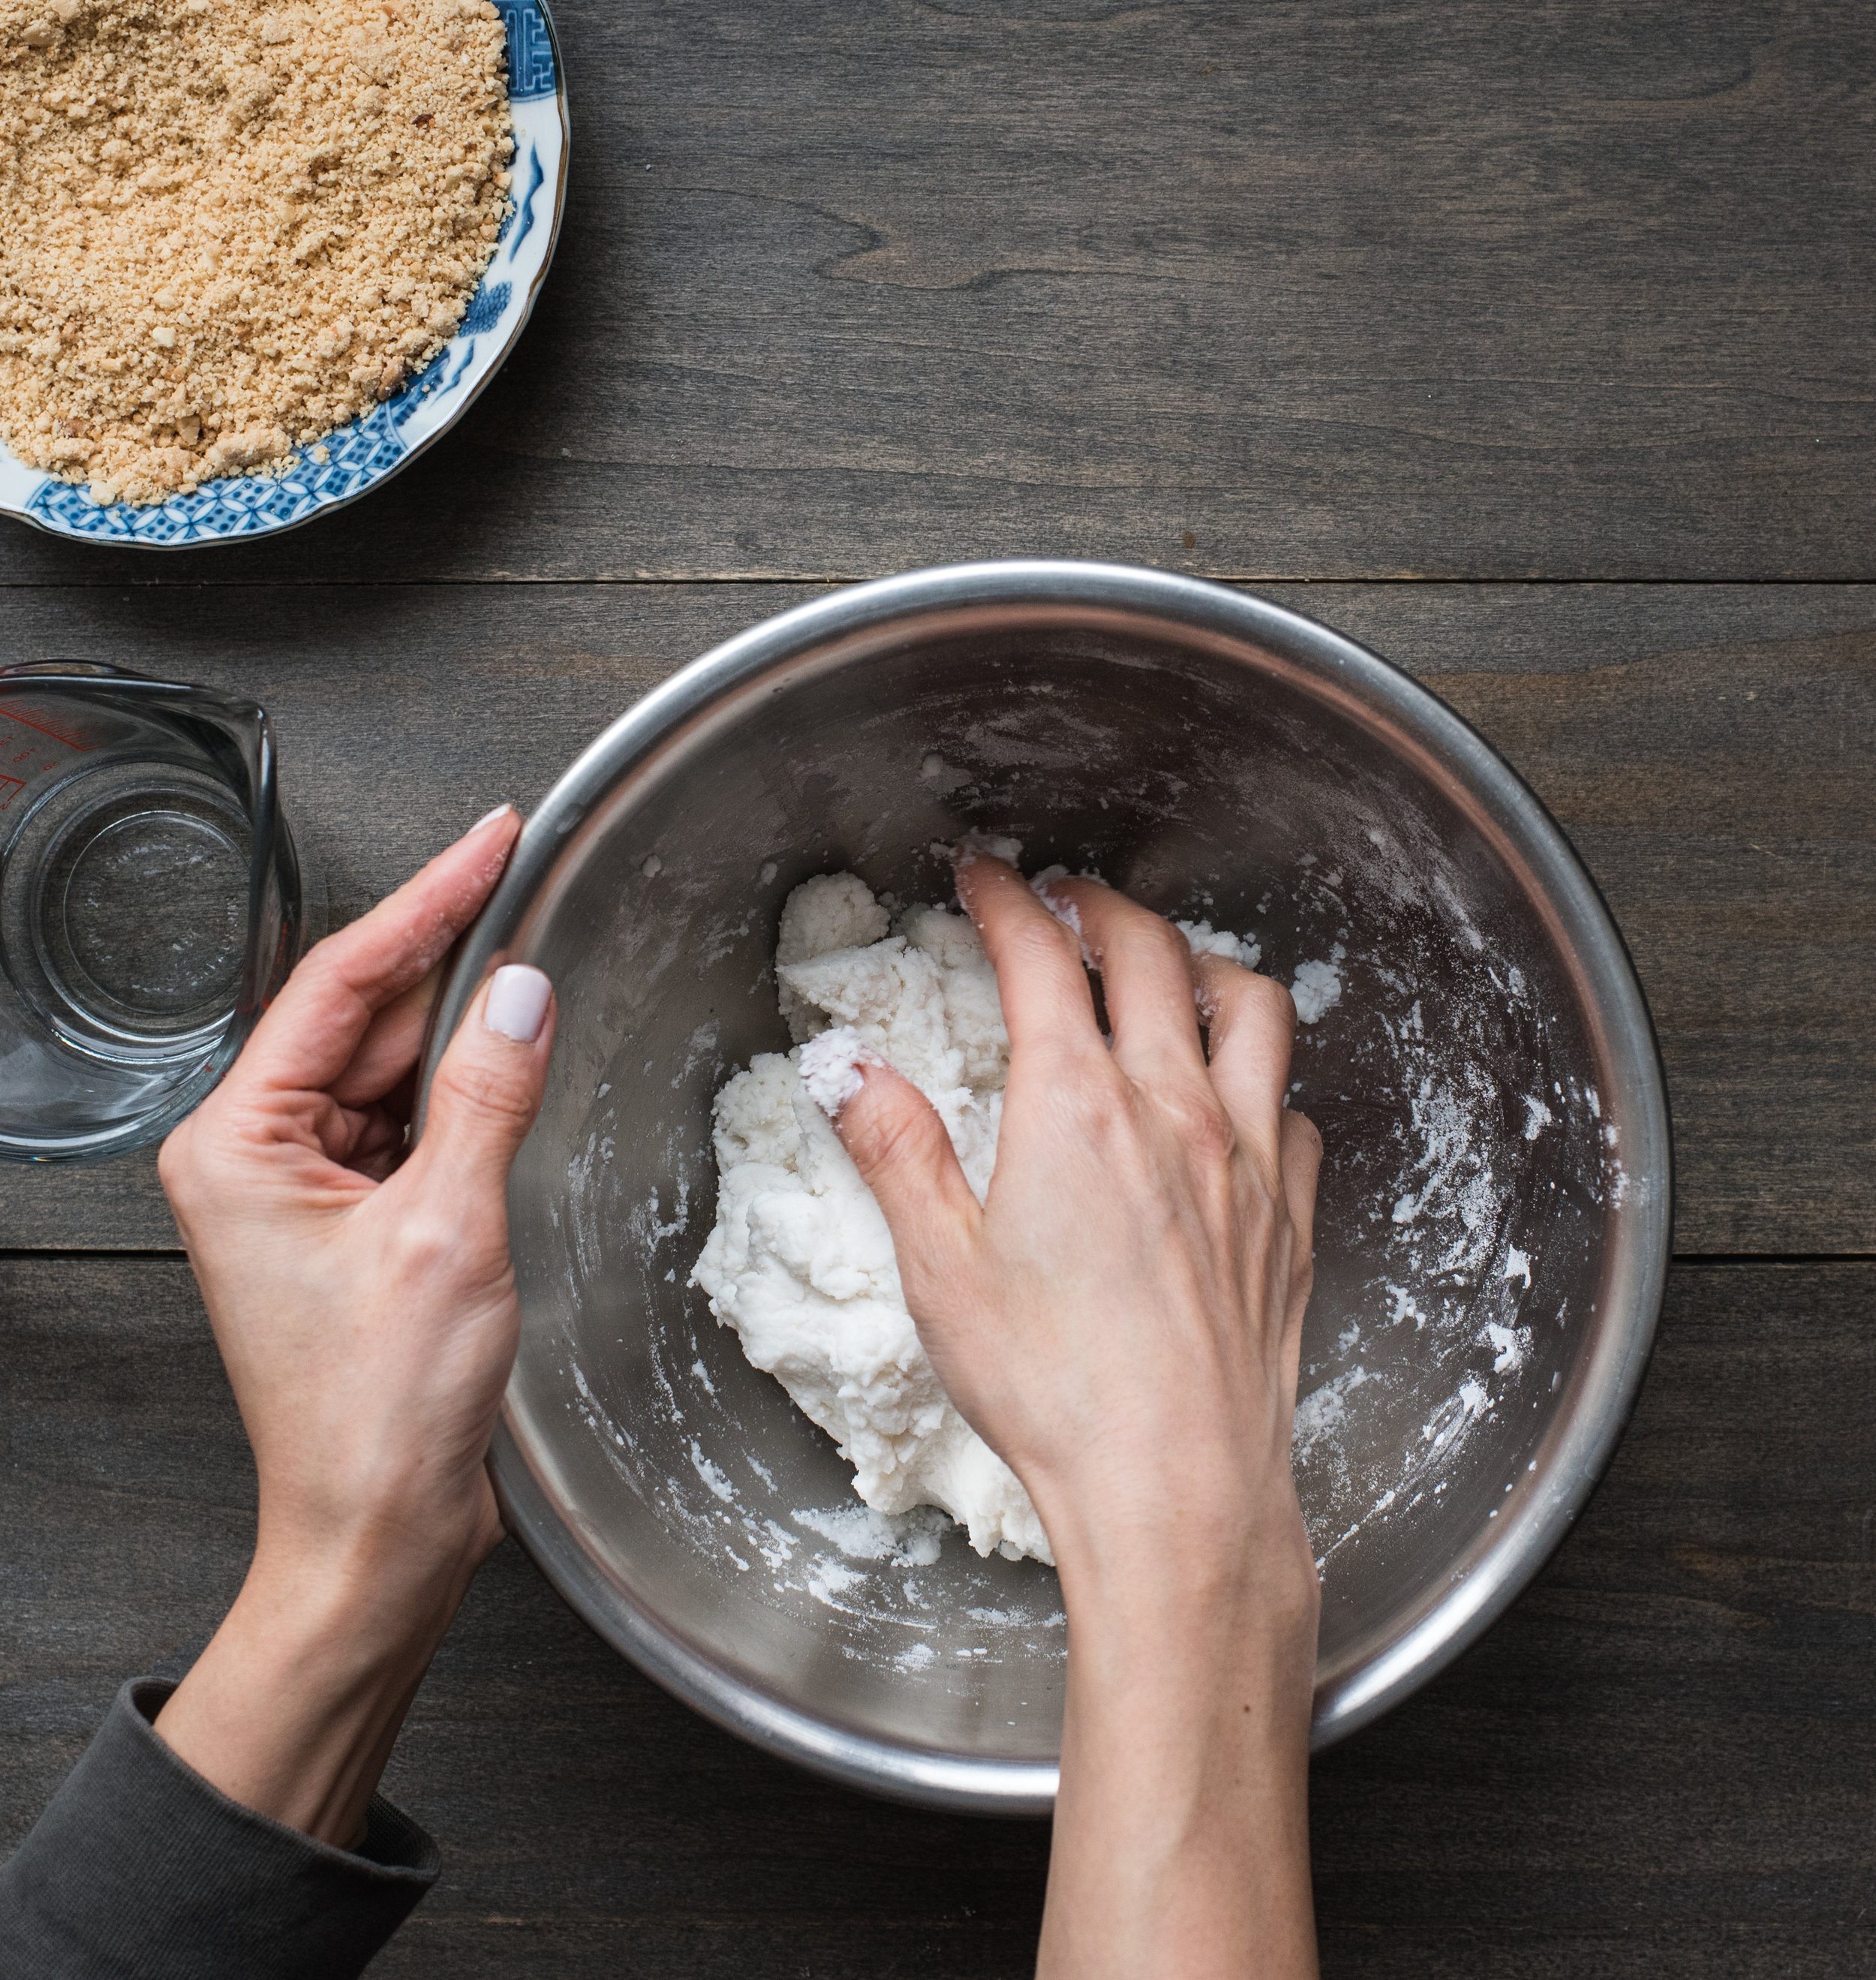
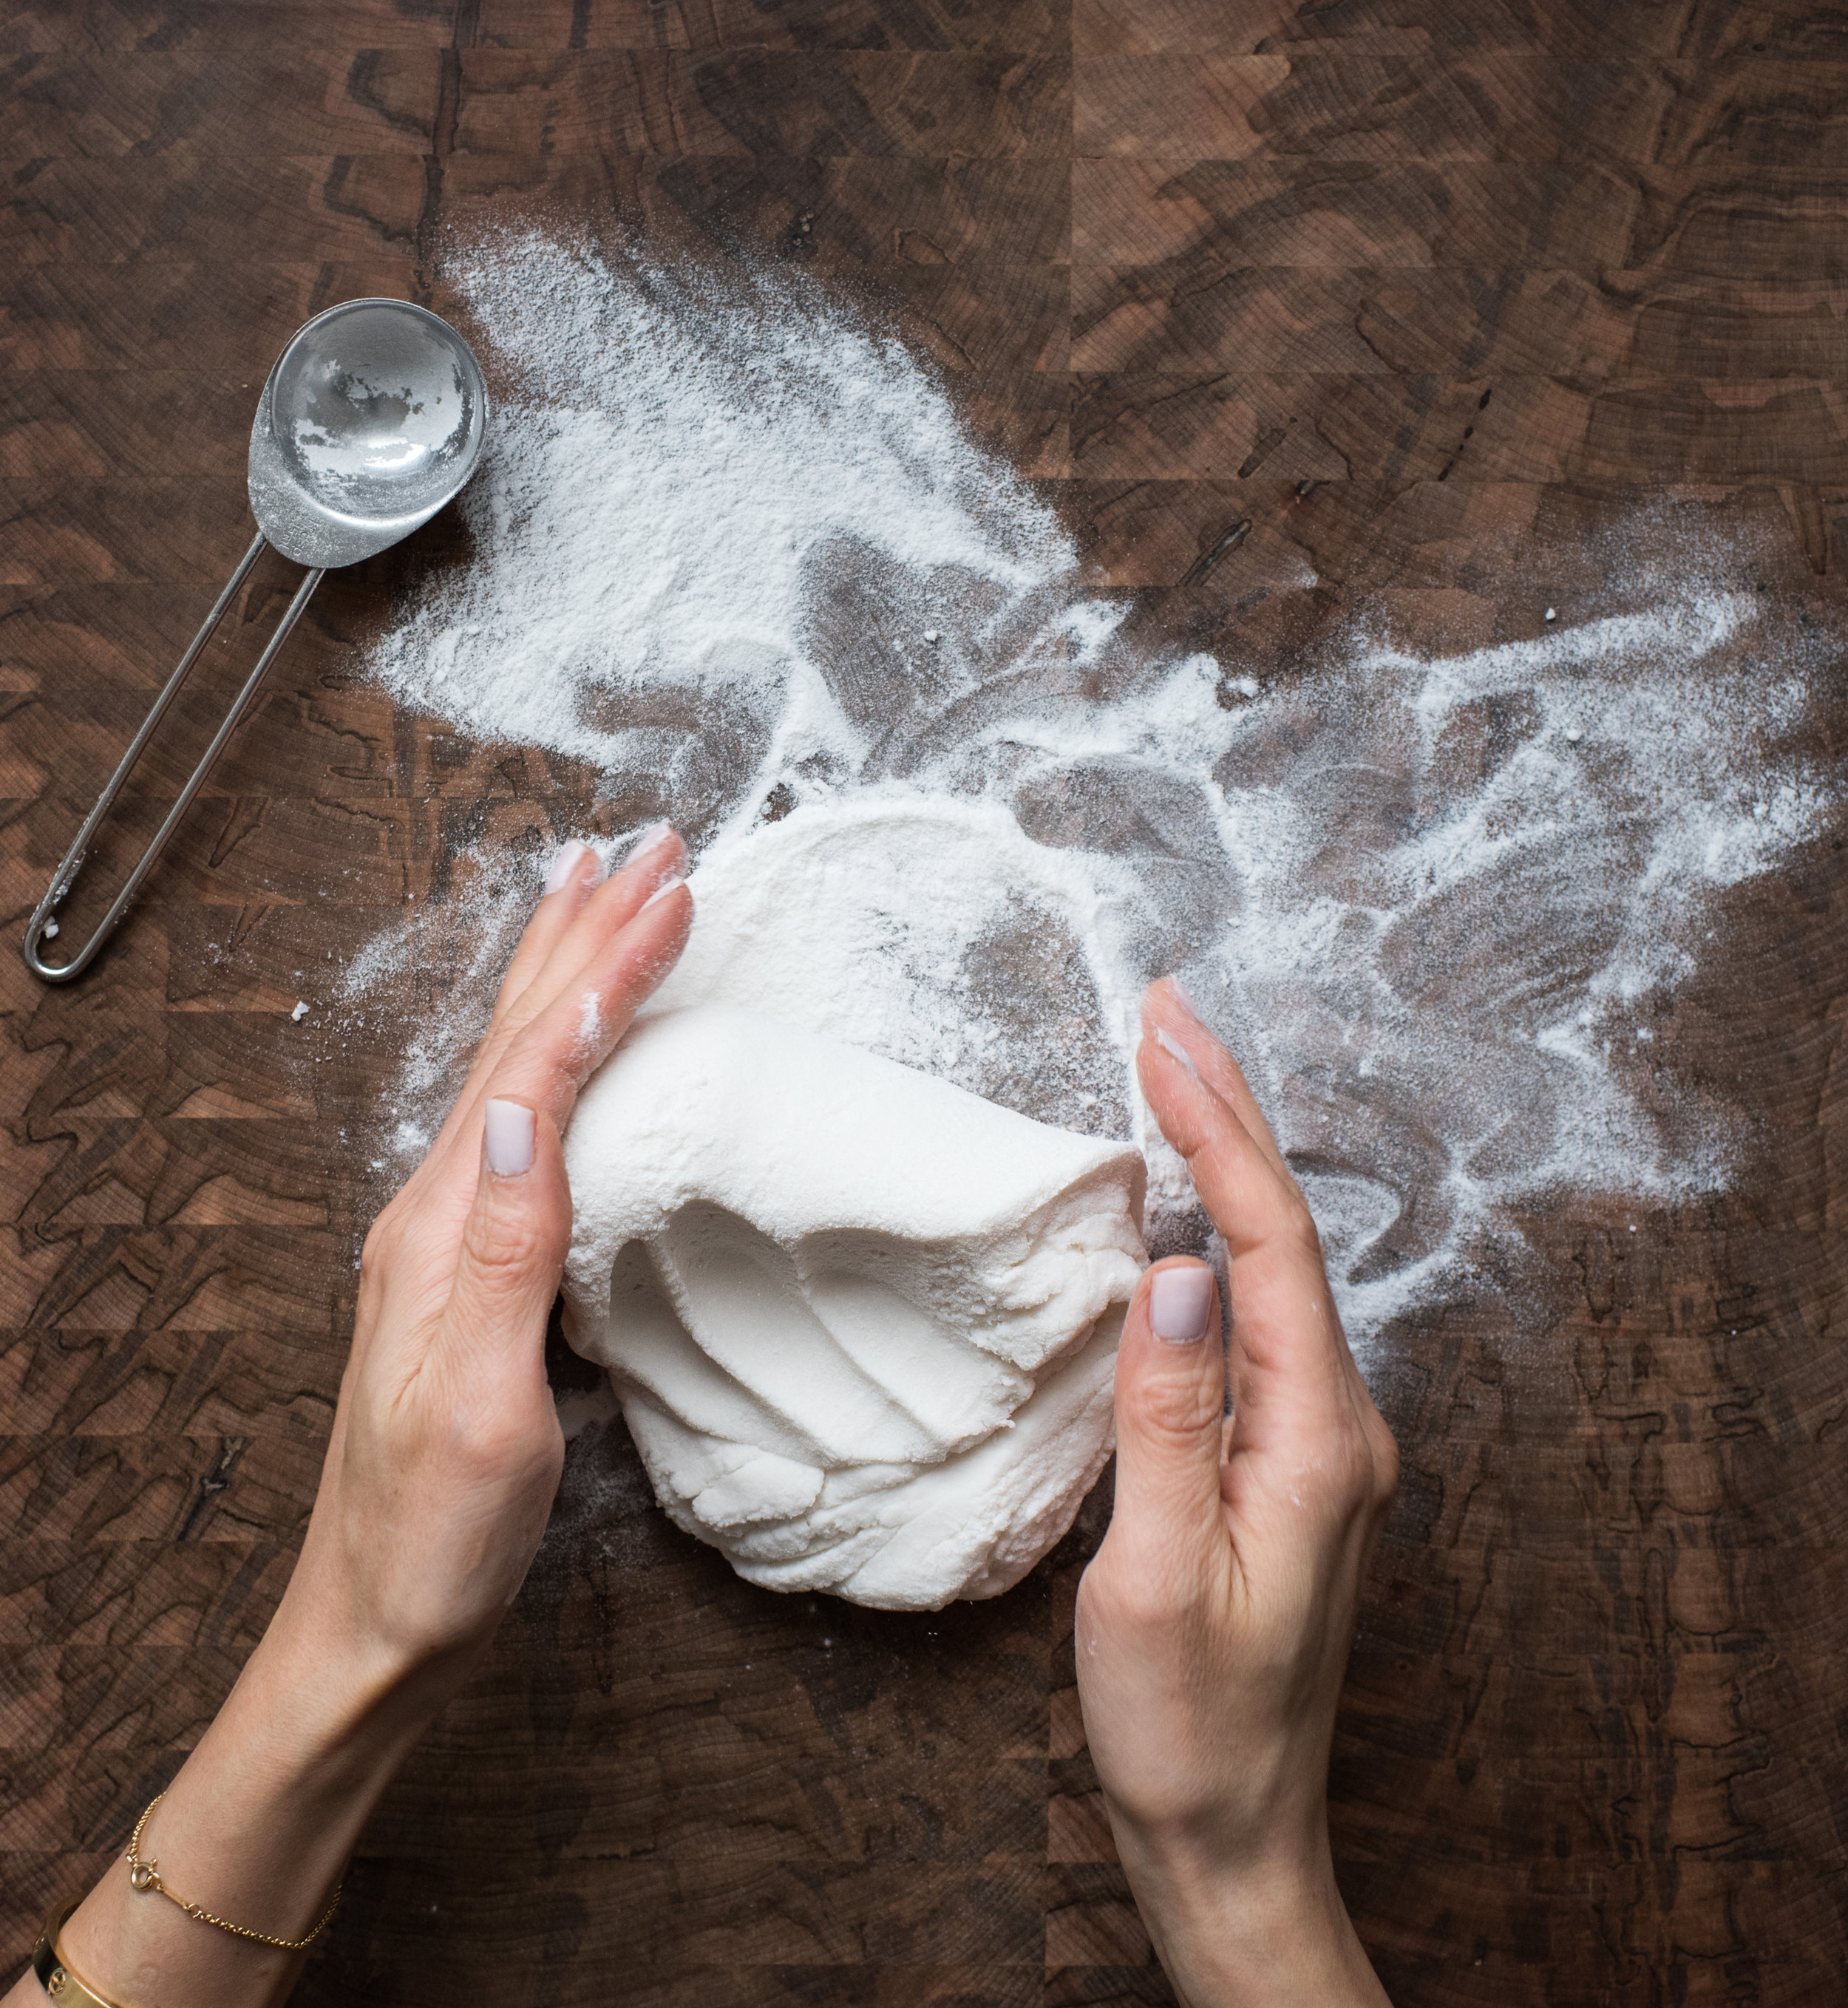
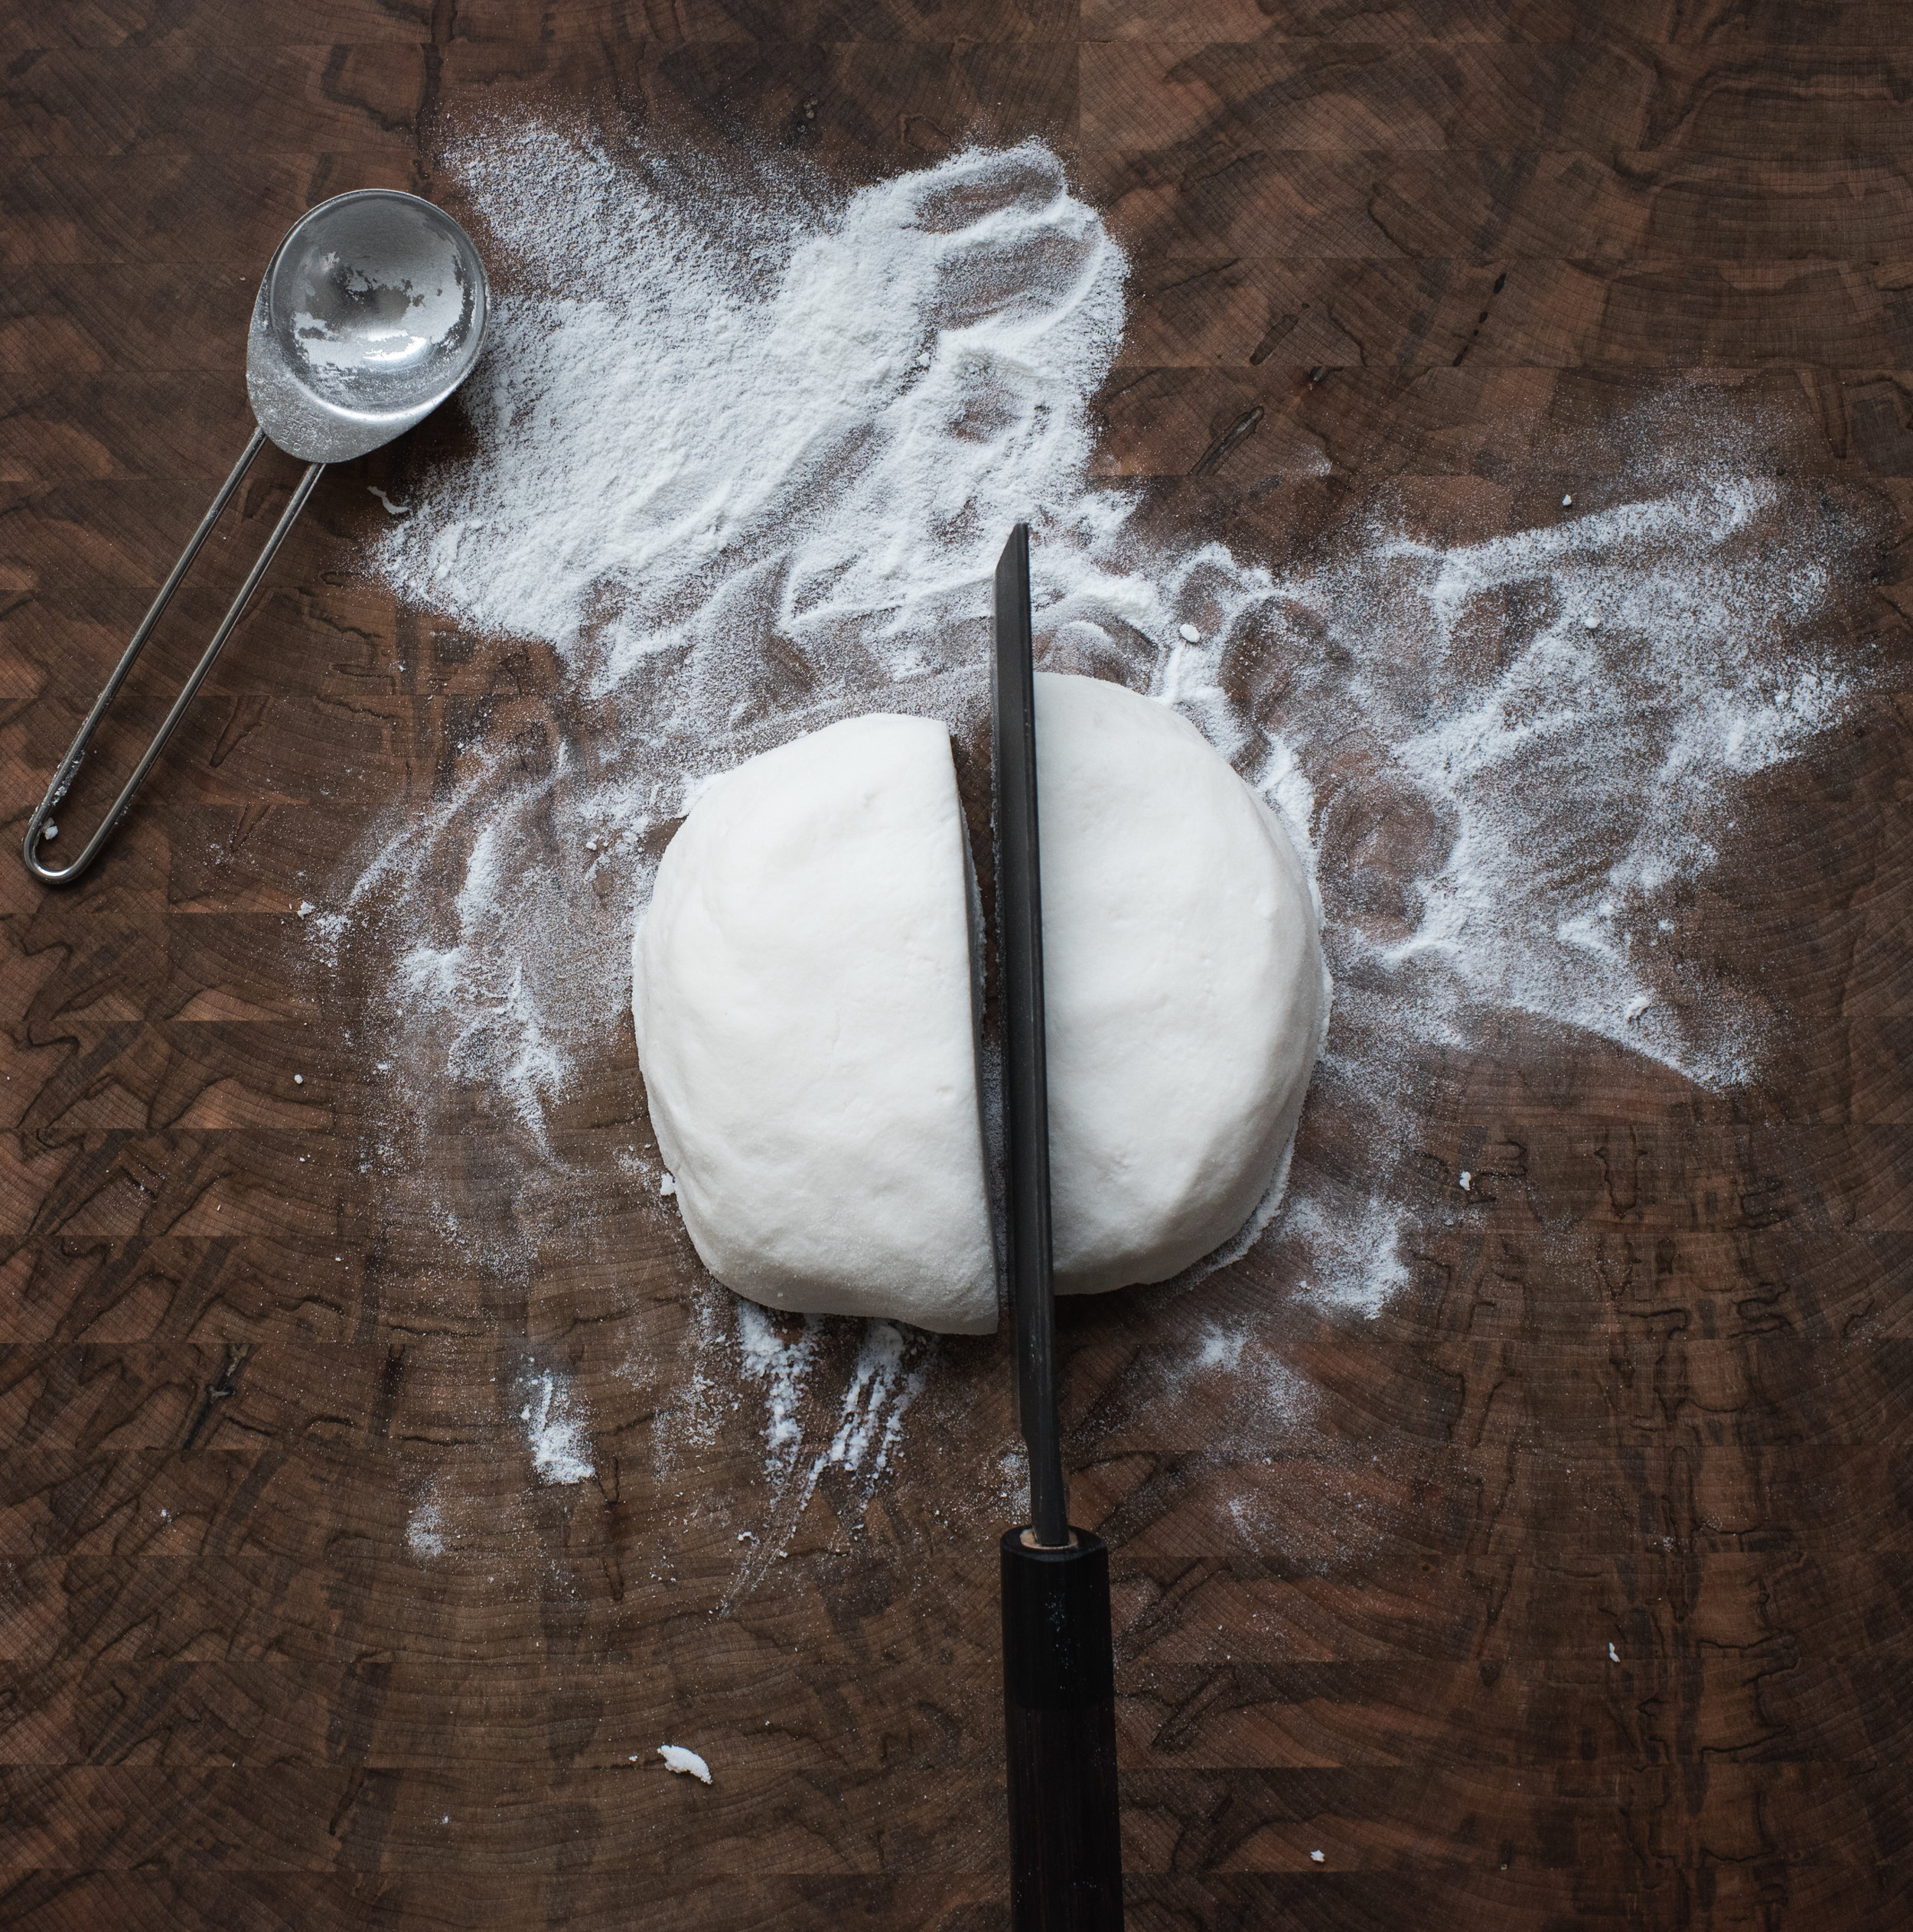
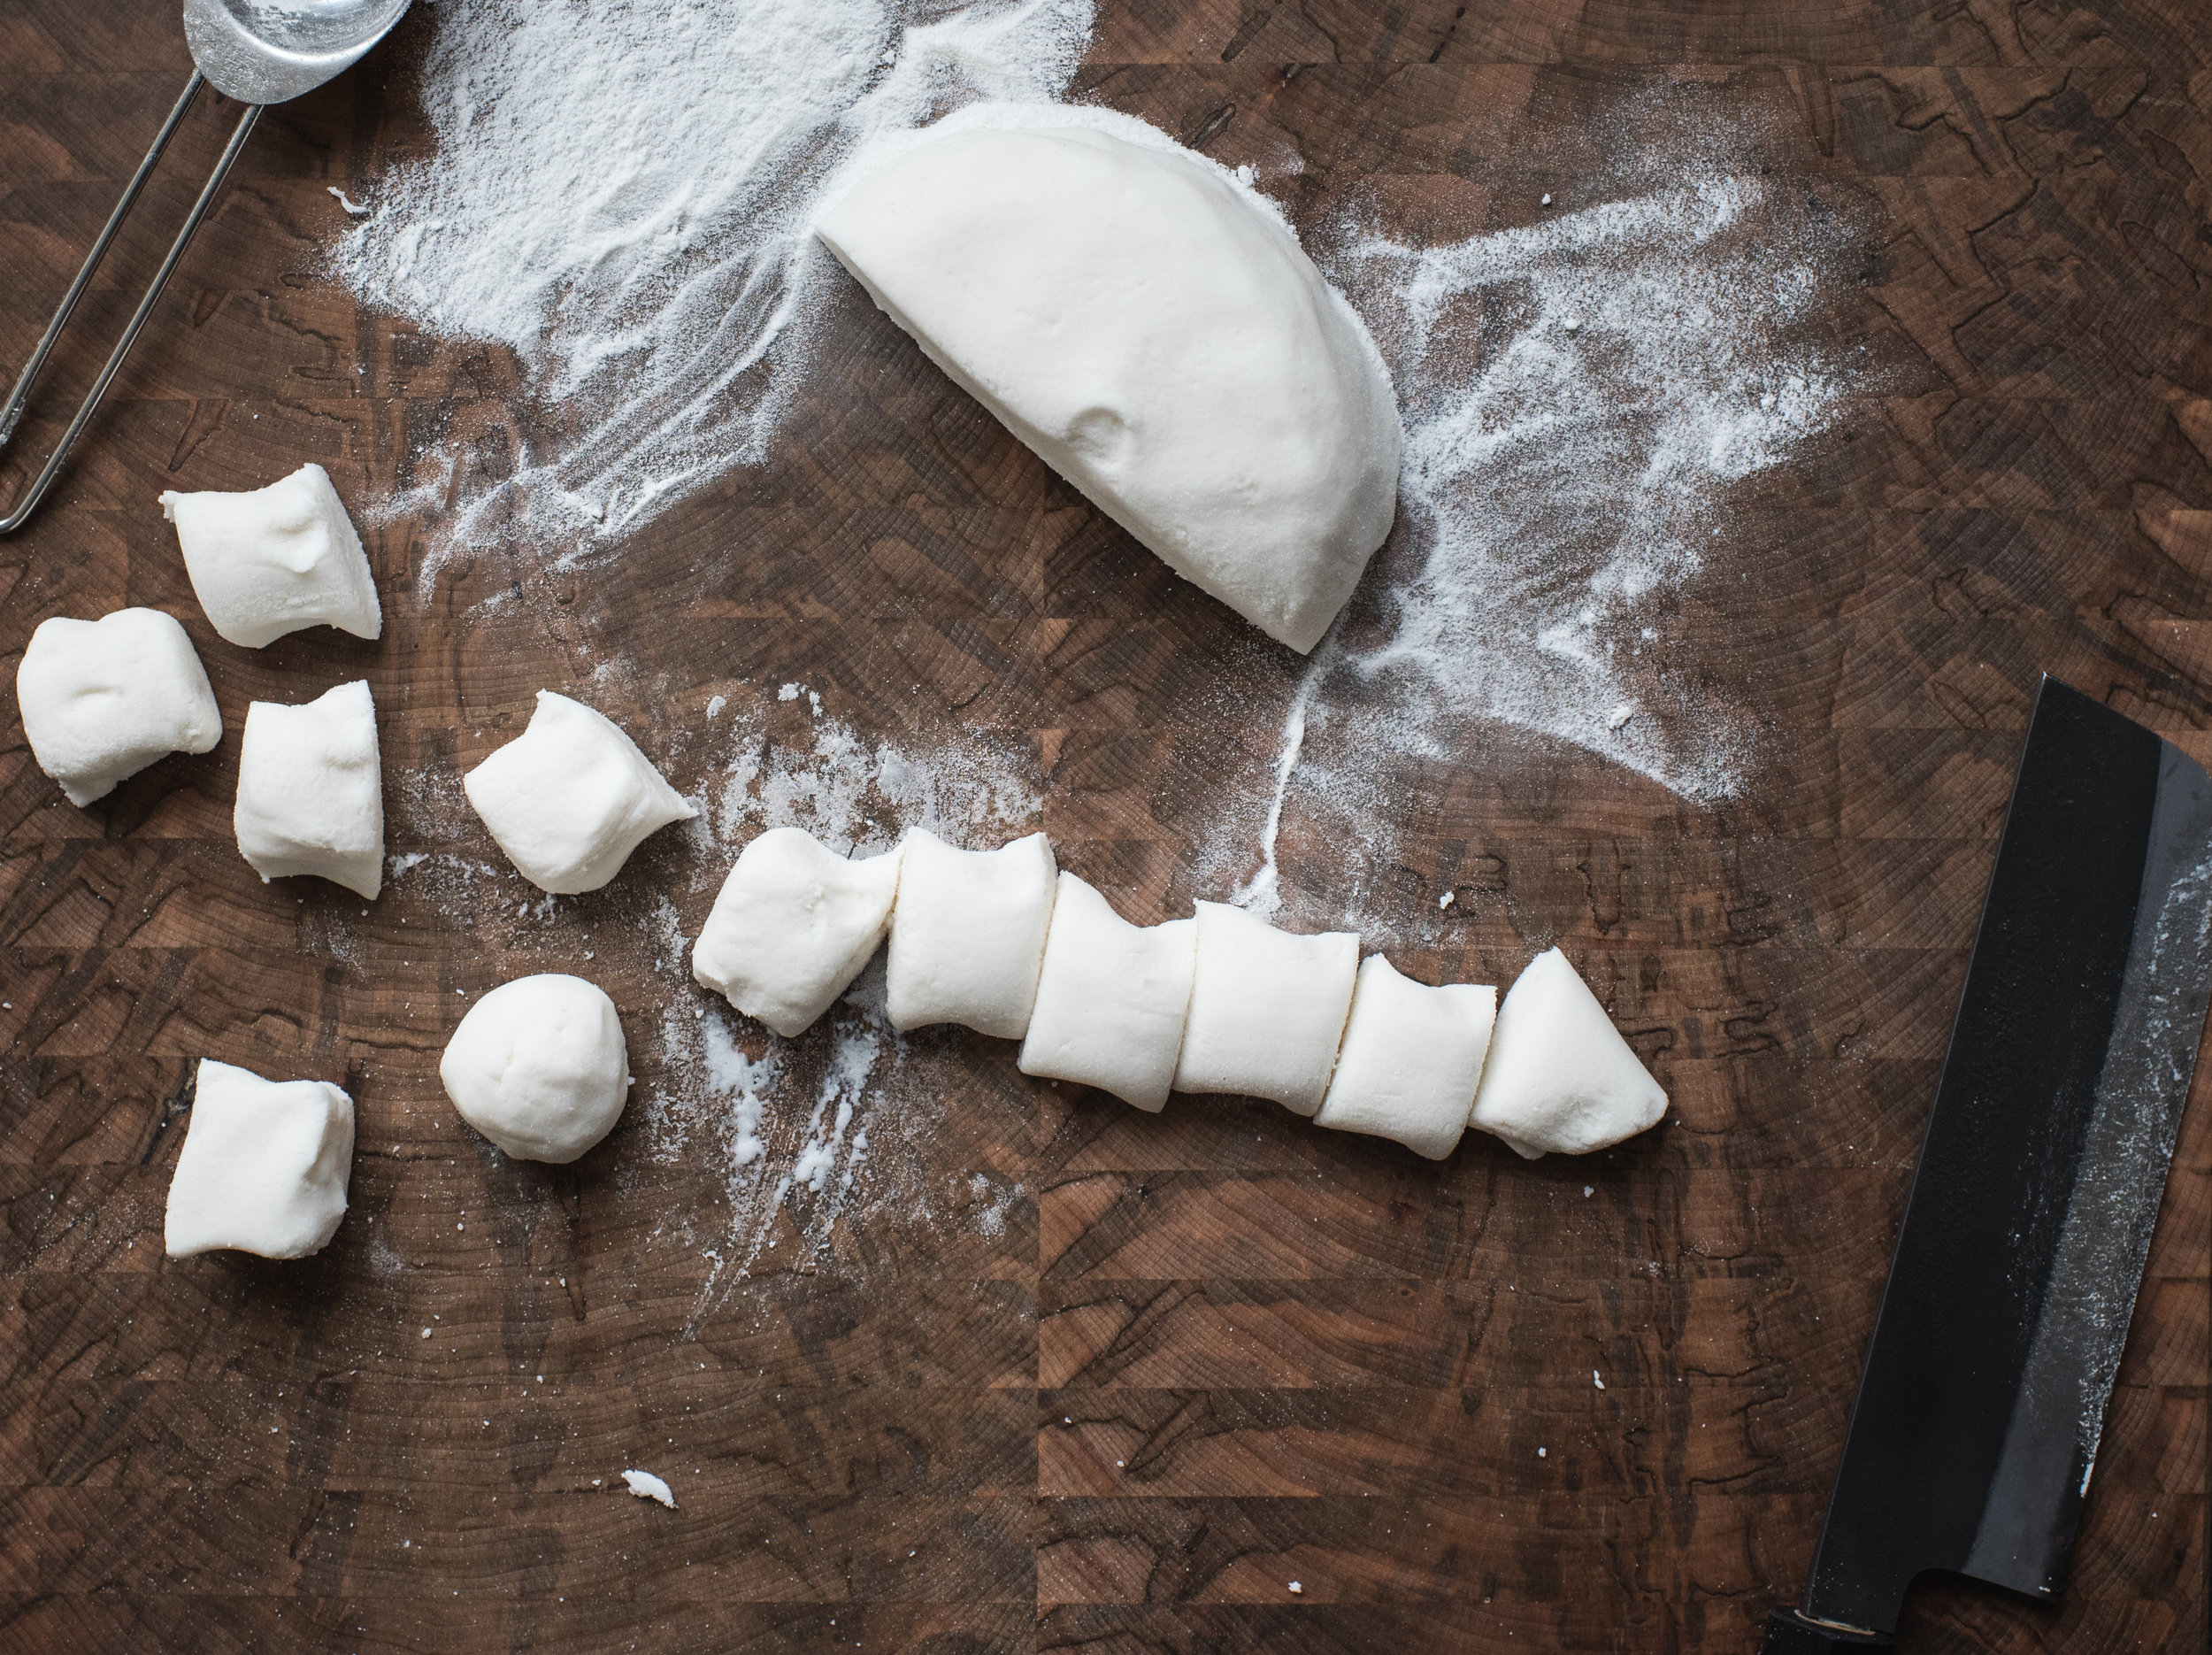
Prepare the dough: Place the glutinous rice flour in a large bowl. Sprinkle the hot water all over the flour and mix with a fork or your fingers while you do so. Next, sprinkle the cold water (don't dump it all in, you may or may not need it all) and continue to mix until a sticky dough starts to form. Adjust until dough feels soft and smooth with just a touch of tackiness when you move it around the bowl - if it's too dry, sprinkle a bit more water or if too wet, sprinkle a bit more flour (keeping in mind the dough will pick up flour from the following kneading step). Dust your work surface with the 1/4 C of glutinous rice flour and dump the dough onto it. Keep kneading it and incorporating some of the flour into the dough as you go. Knead for a couple of minutes more until it is smooth. Divide the dough ball into two, and again into another two, for a total of 4 pieces. Roll each out into thick logs and cut each log into 4 equal-sized pieces. You now have 16 dough pieces.
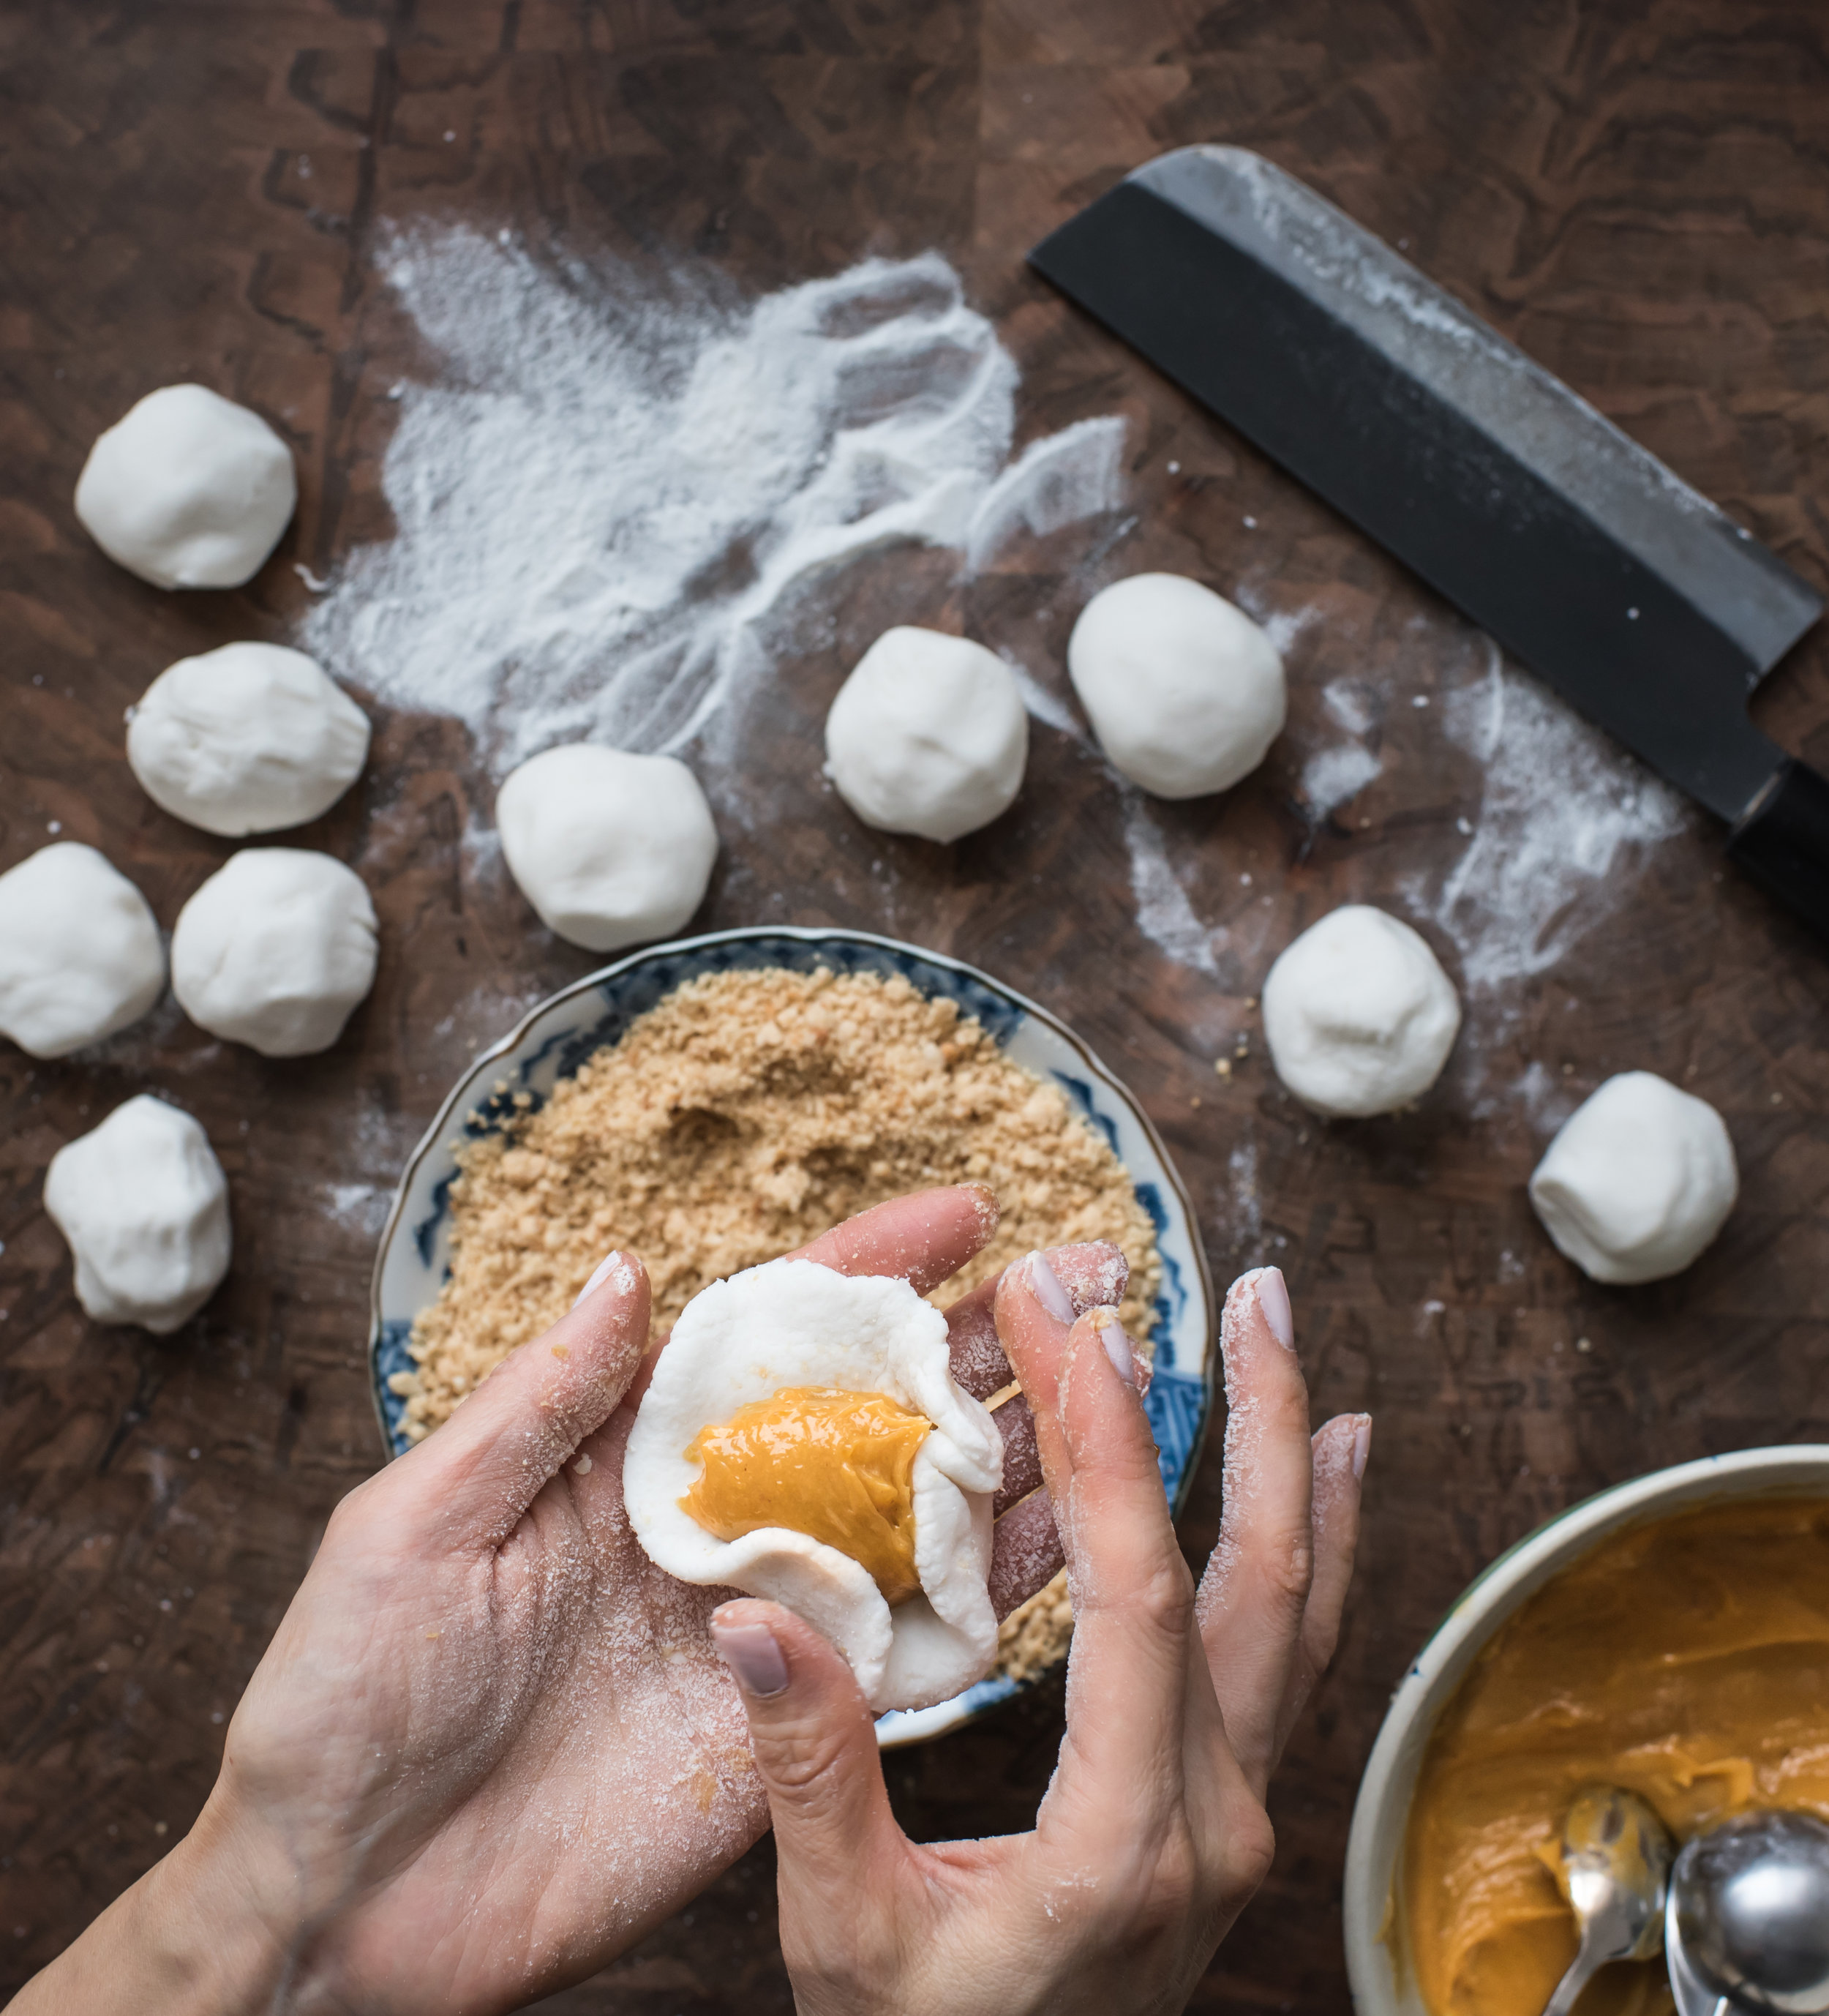
Fill and form the sticky rice cakes: Take one dough piece and roll it into a ball with your hands. Then use your fingers to shape and flatten into a curved (bowl) disc about 3" in diameter. Place about 1 tbsp of filling in the center and begin working the dough around the filling until it is completely enclosed and sealed. Drop the ball into the bowl of peanut crumble and gently press to adhere, flattening the ball slightly into a thick disc. Shake off excess peanut. Do this for the remaining 15 sticky rice cakes.
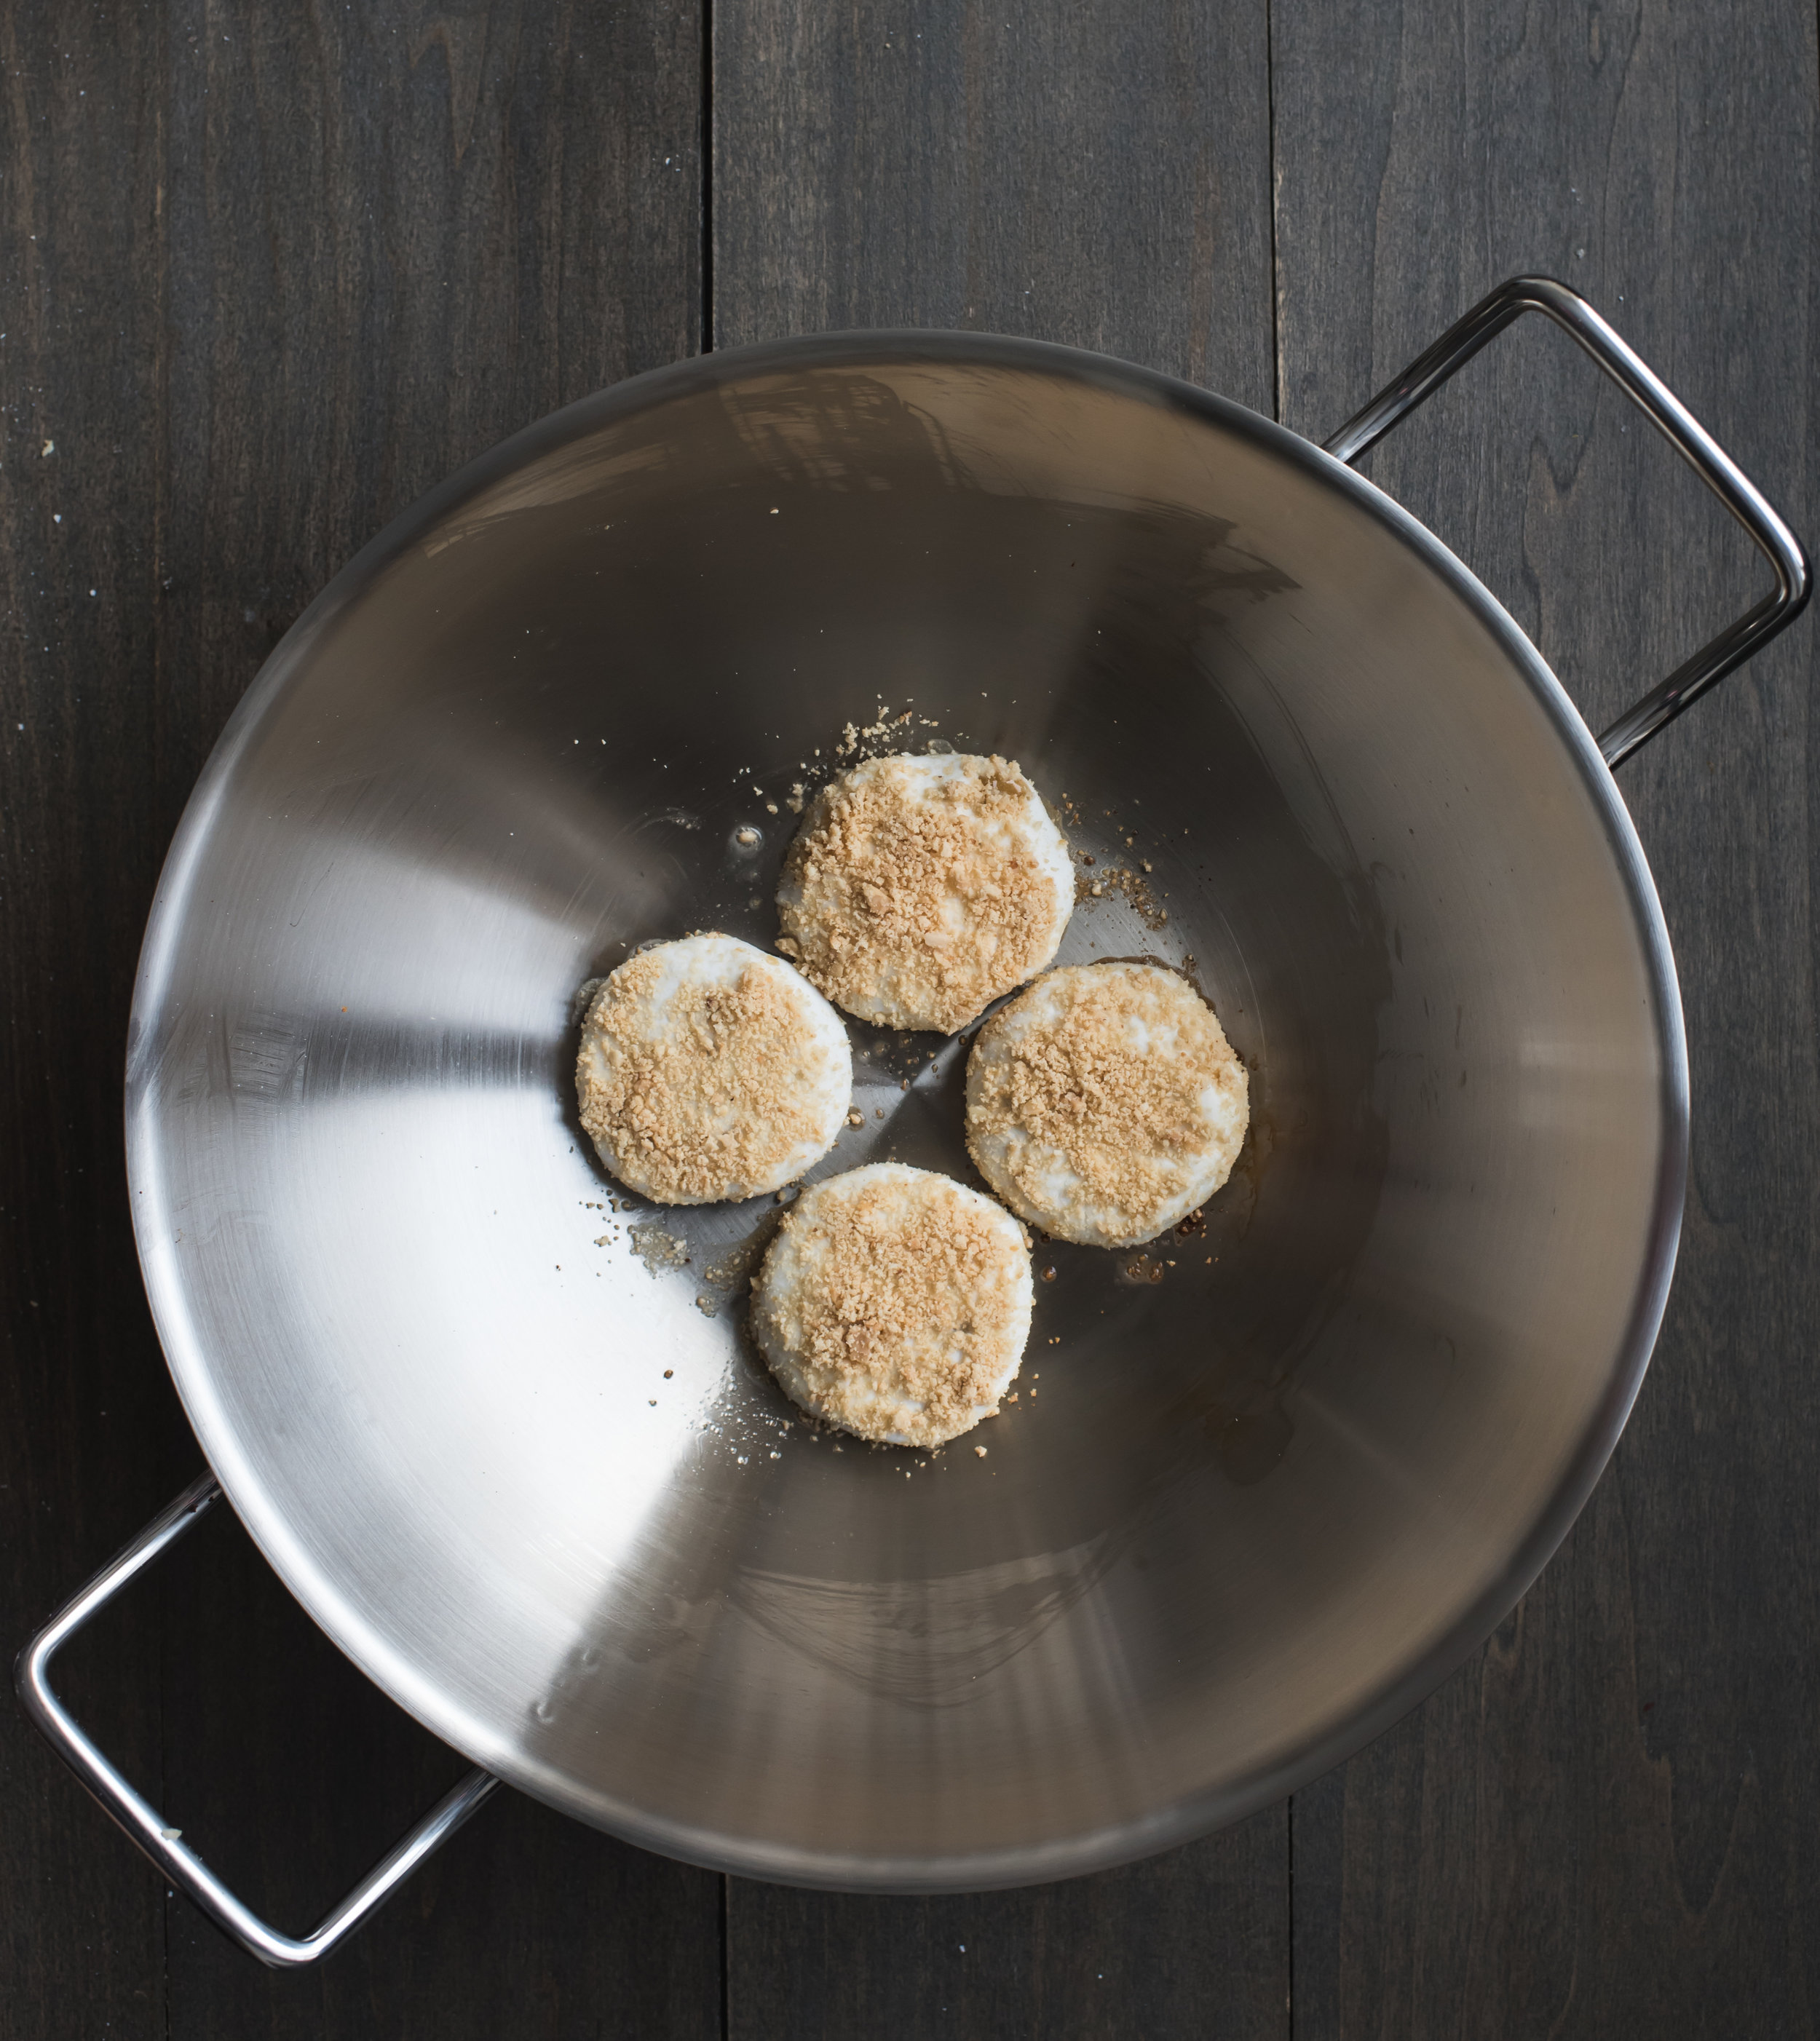
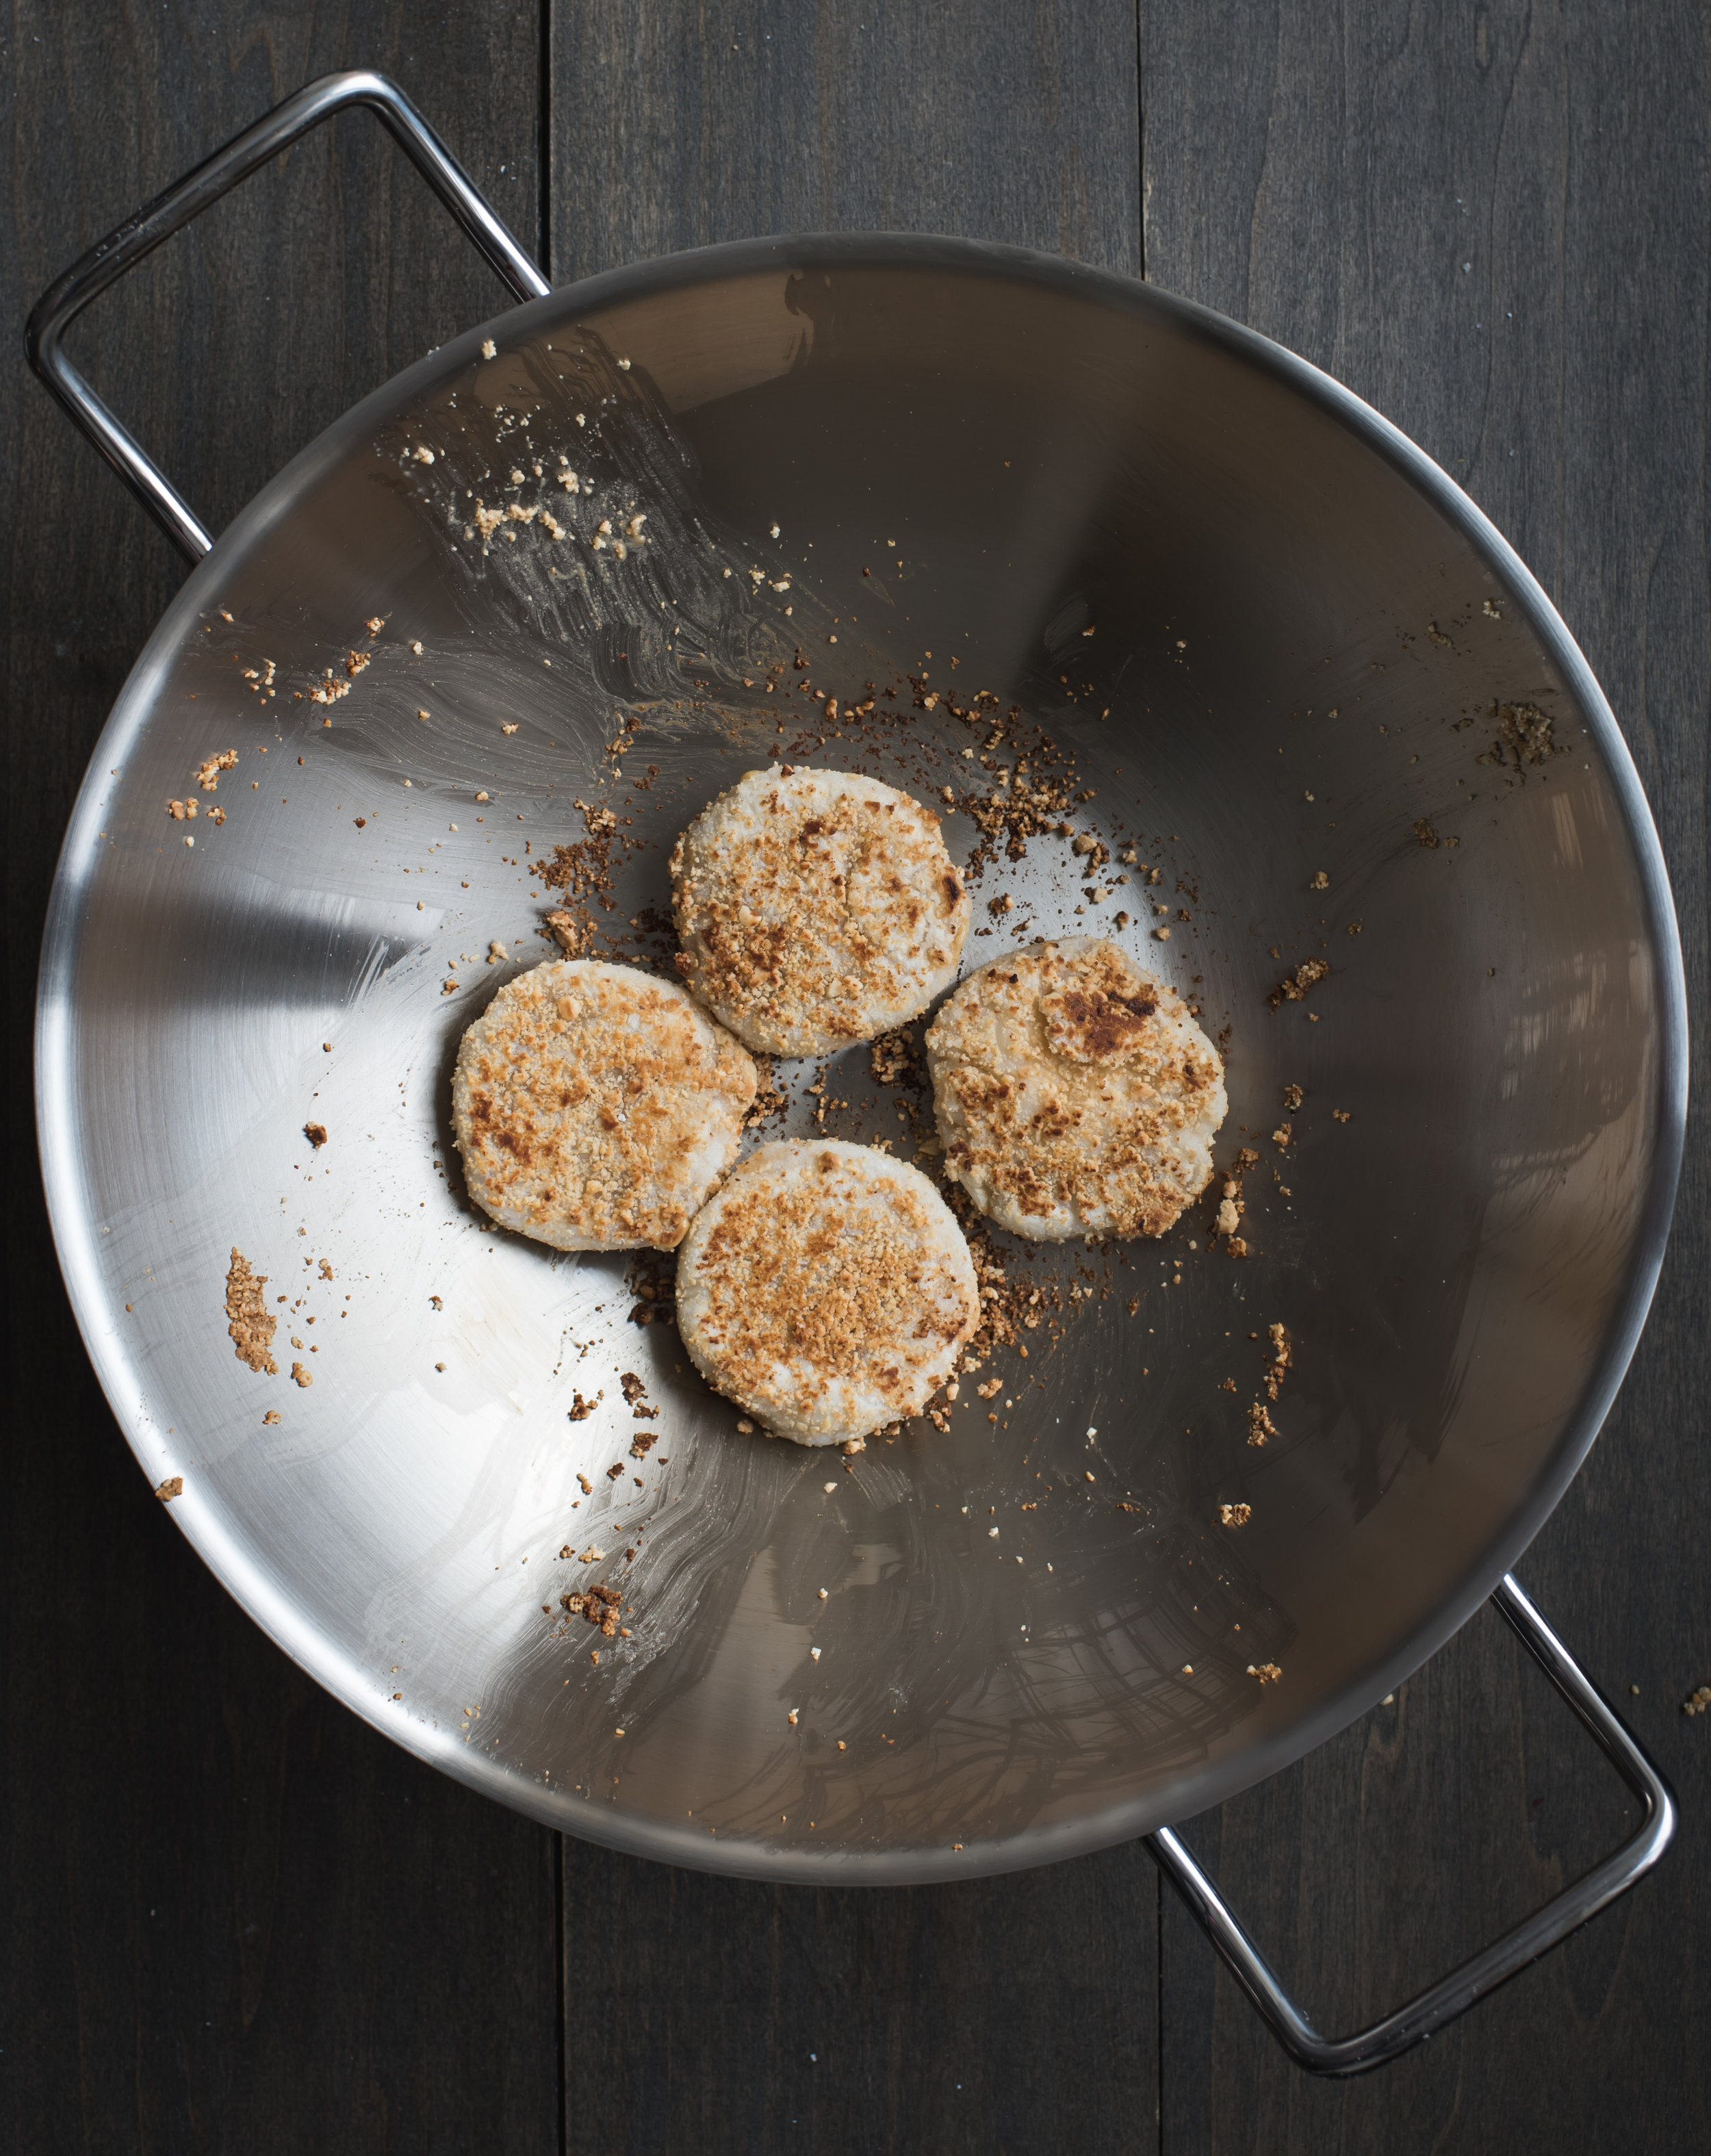
Pan fry: Heat a heavy-bottomed wok or skillet over medium heat. Once it is hot, add about 1.5 tsp of coconut oil and place 4 cakes in. Cook the first side 3 minutes or until slightly brown, and flip to cook the other side for another 2 minutes or so. Transfer to a plate to cool. If there are brown bits of peanuts in the wok or skillet, remove them (I used a large piece of paper towel to wipe it off) before you continue with the next batch, adding additional oil for each batch.
Enjoy them warm!
If you like this recipe, pin it to Pinterest! You can also leave me a comment below to let me know what you think of this post - I would love that. :)
**GIVEAWAY CLOSE**
Zwilling Giveaway : Full terms and conditions:
The contest is in no way sponsored, endorsed or administered by, or associated with Instagram.
Closing date for entry will be February 14, 2018 at 11:59PM EST. No responsibility can be accepted for entries not received for whatever reason.
Winner will be chosen at random, notified by DM on Instagram and announced on Instagram on February 15, 2018.
If the winner cannot be contacted or does not claim the prize within 14 days of notification, we reserve the right to withdraw the prize from the winner and pick a replacement winner.
By entering this competition, an entrant is indicating his/her agreement to be bound by these terms and conditions.
All entries must have open and public Instagram accounts for verification of following terms.
Entry into the competition will be deemed as acceptance of these terms and conditions.





Hi, I’m Sonia
I share recipes inspired by my food cravings and what I make for my family. My role as a working mom of two girls, my life in Toronto Canada and my background as a Chinese immigrant from Hong Kong all inform the things I love, crave and create. This means an emphasis on wholesome recipes that are approachable for busy weeknights and fun recipes to make on weekends and for friends!
homemade food to nourish and indulge …
More about Sonia >