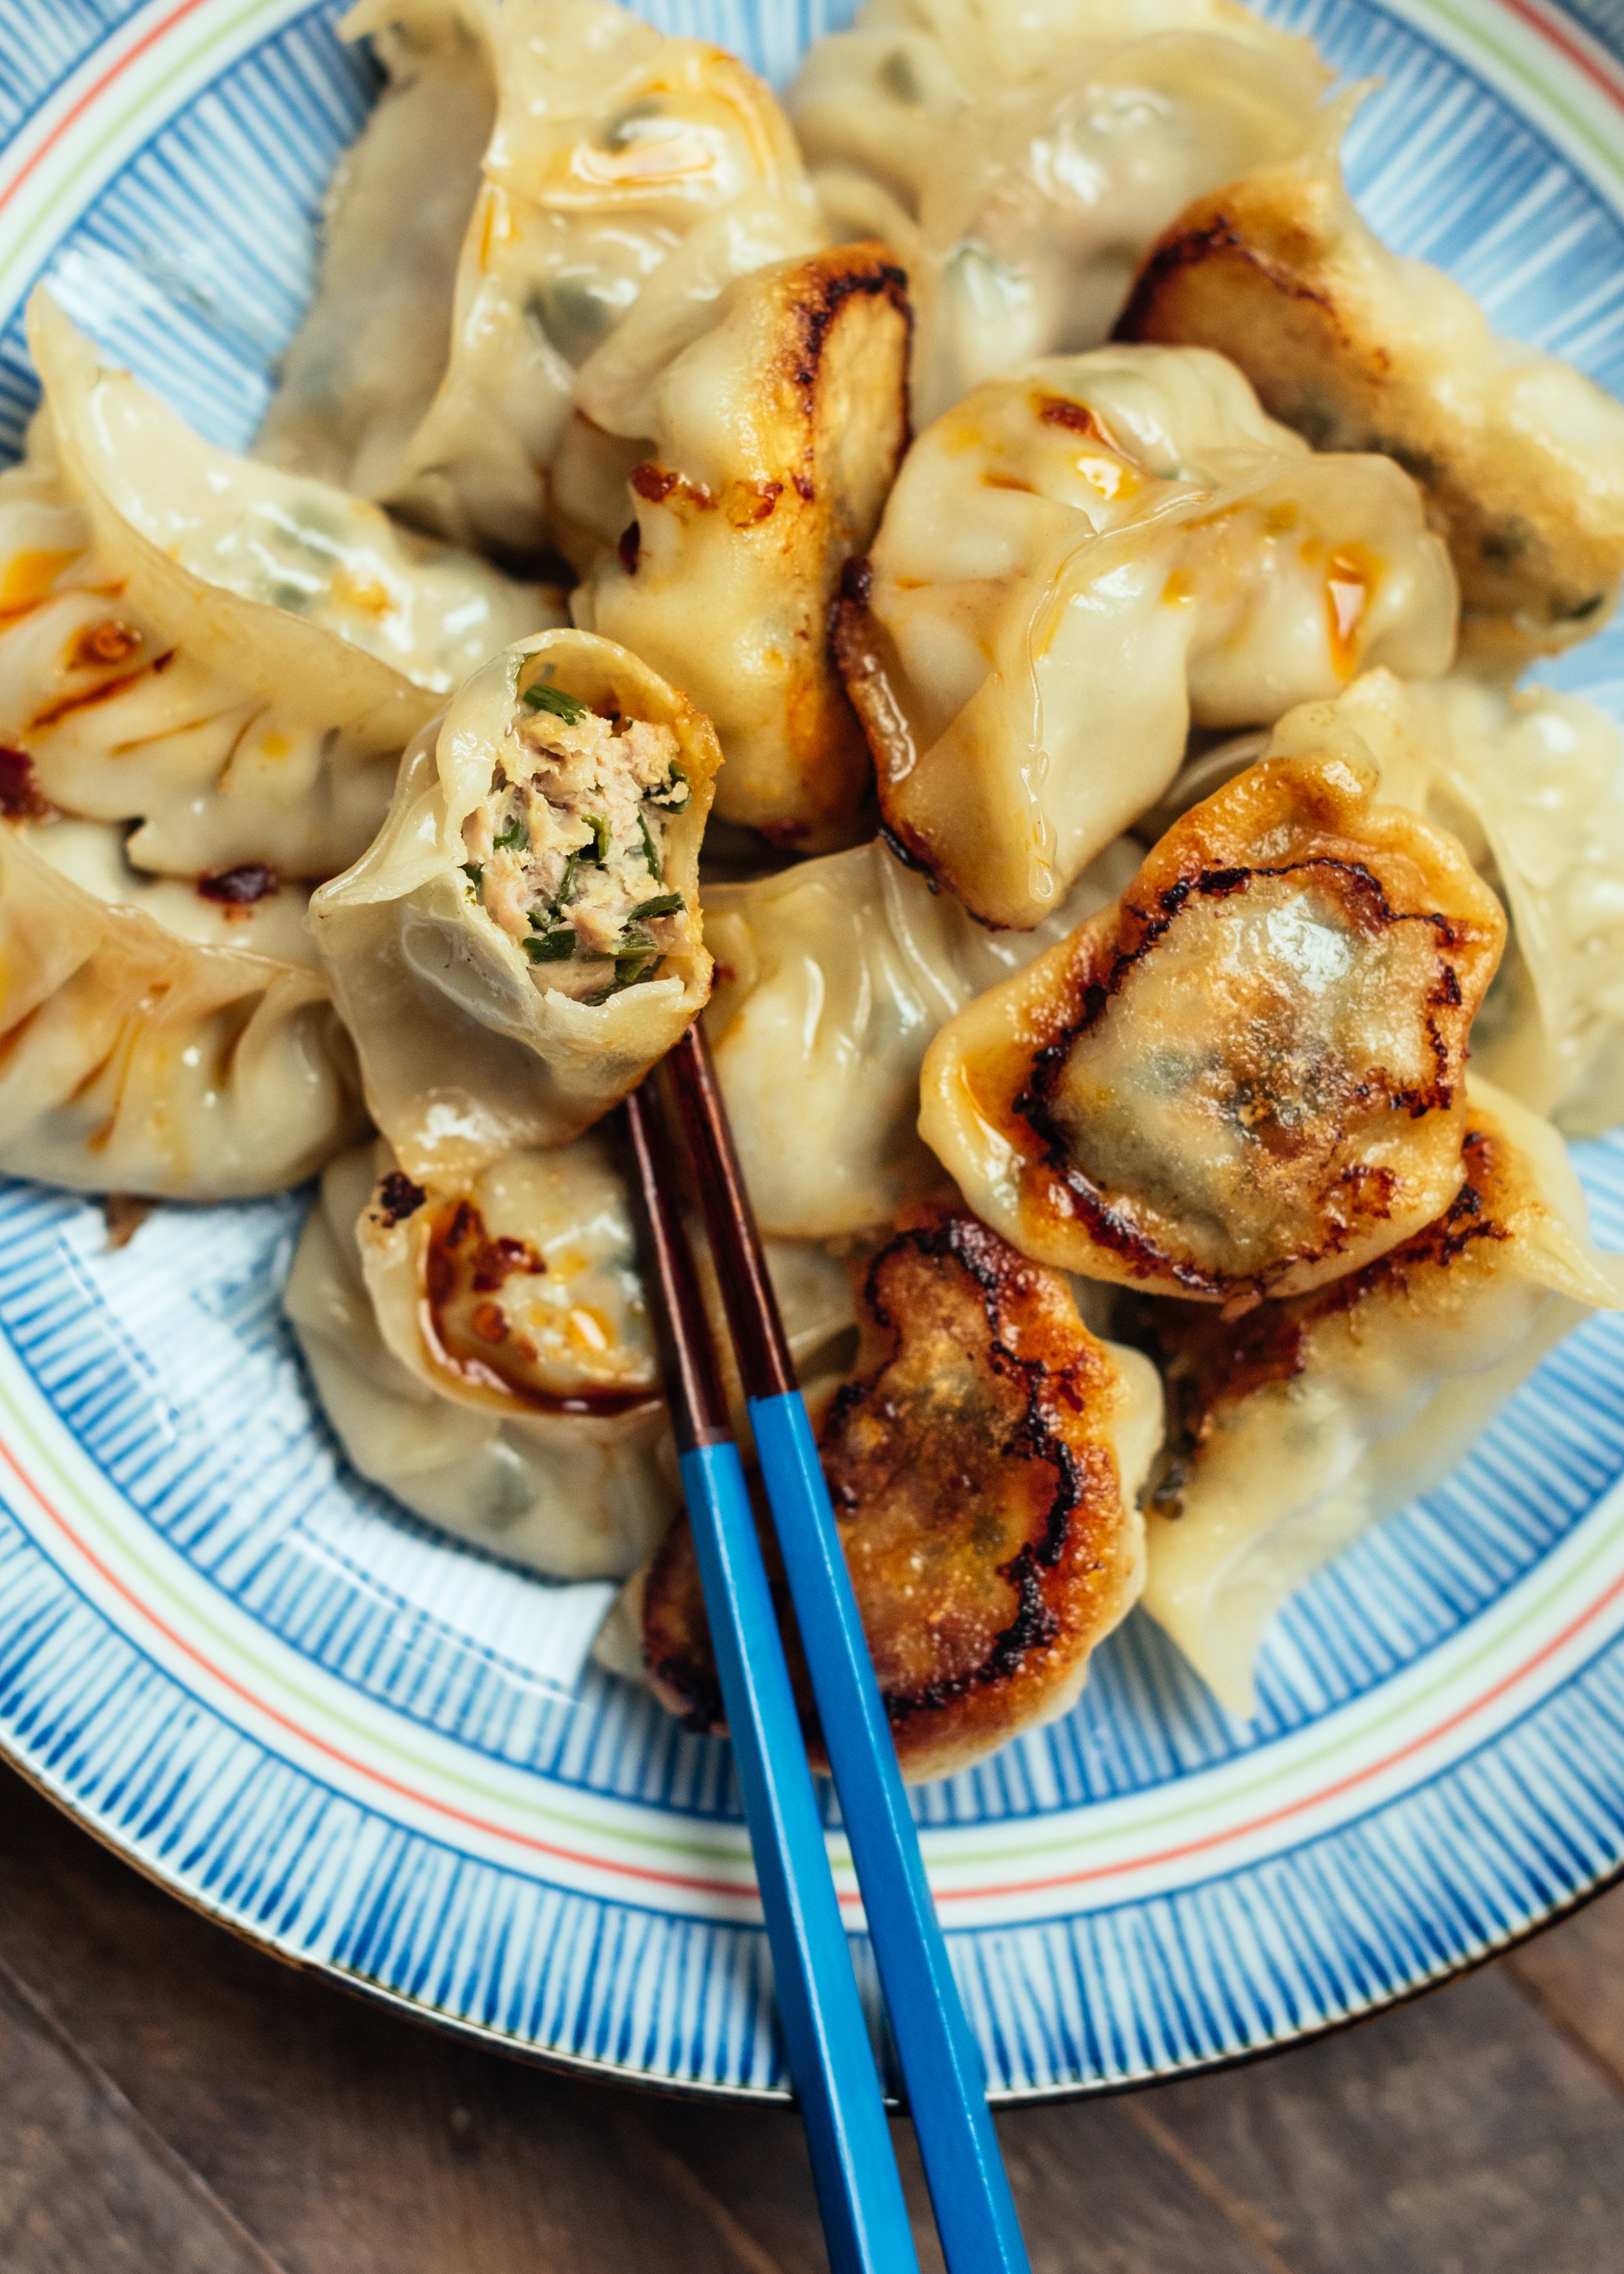
Chinese Chives and Pork Dumplings
Very classic filling, very delicious and very easy to make. Whether you’re new to dumpling-making or an aficionado, this Chinese Chives and Pork Dumplings should be a mainstay in your dumpling repertoire.
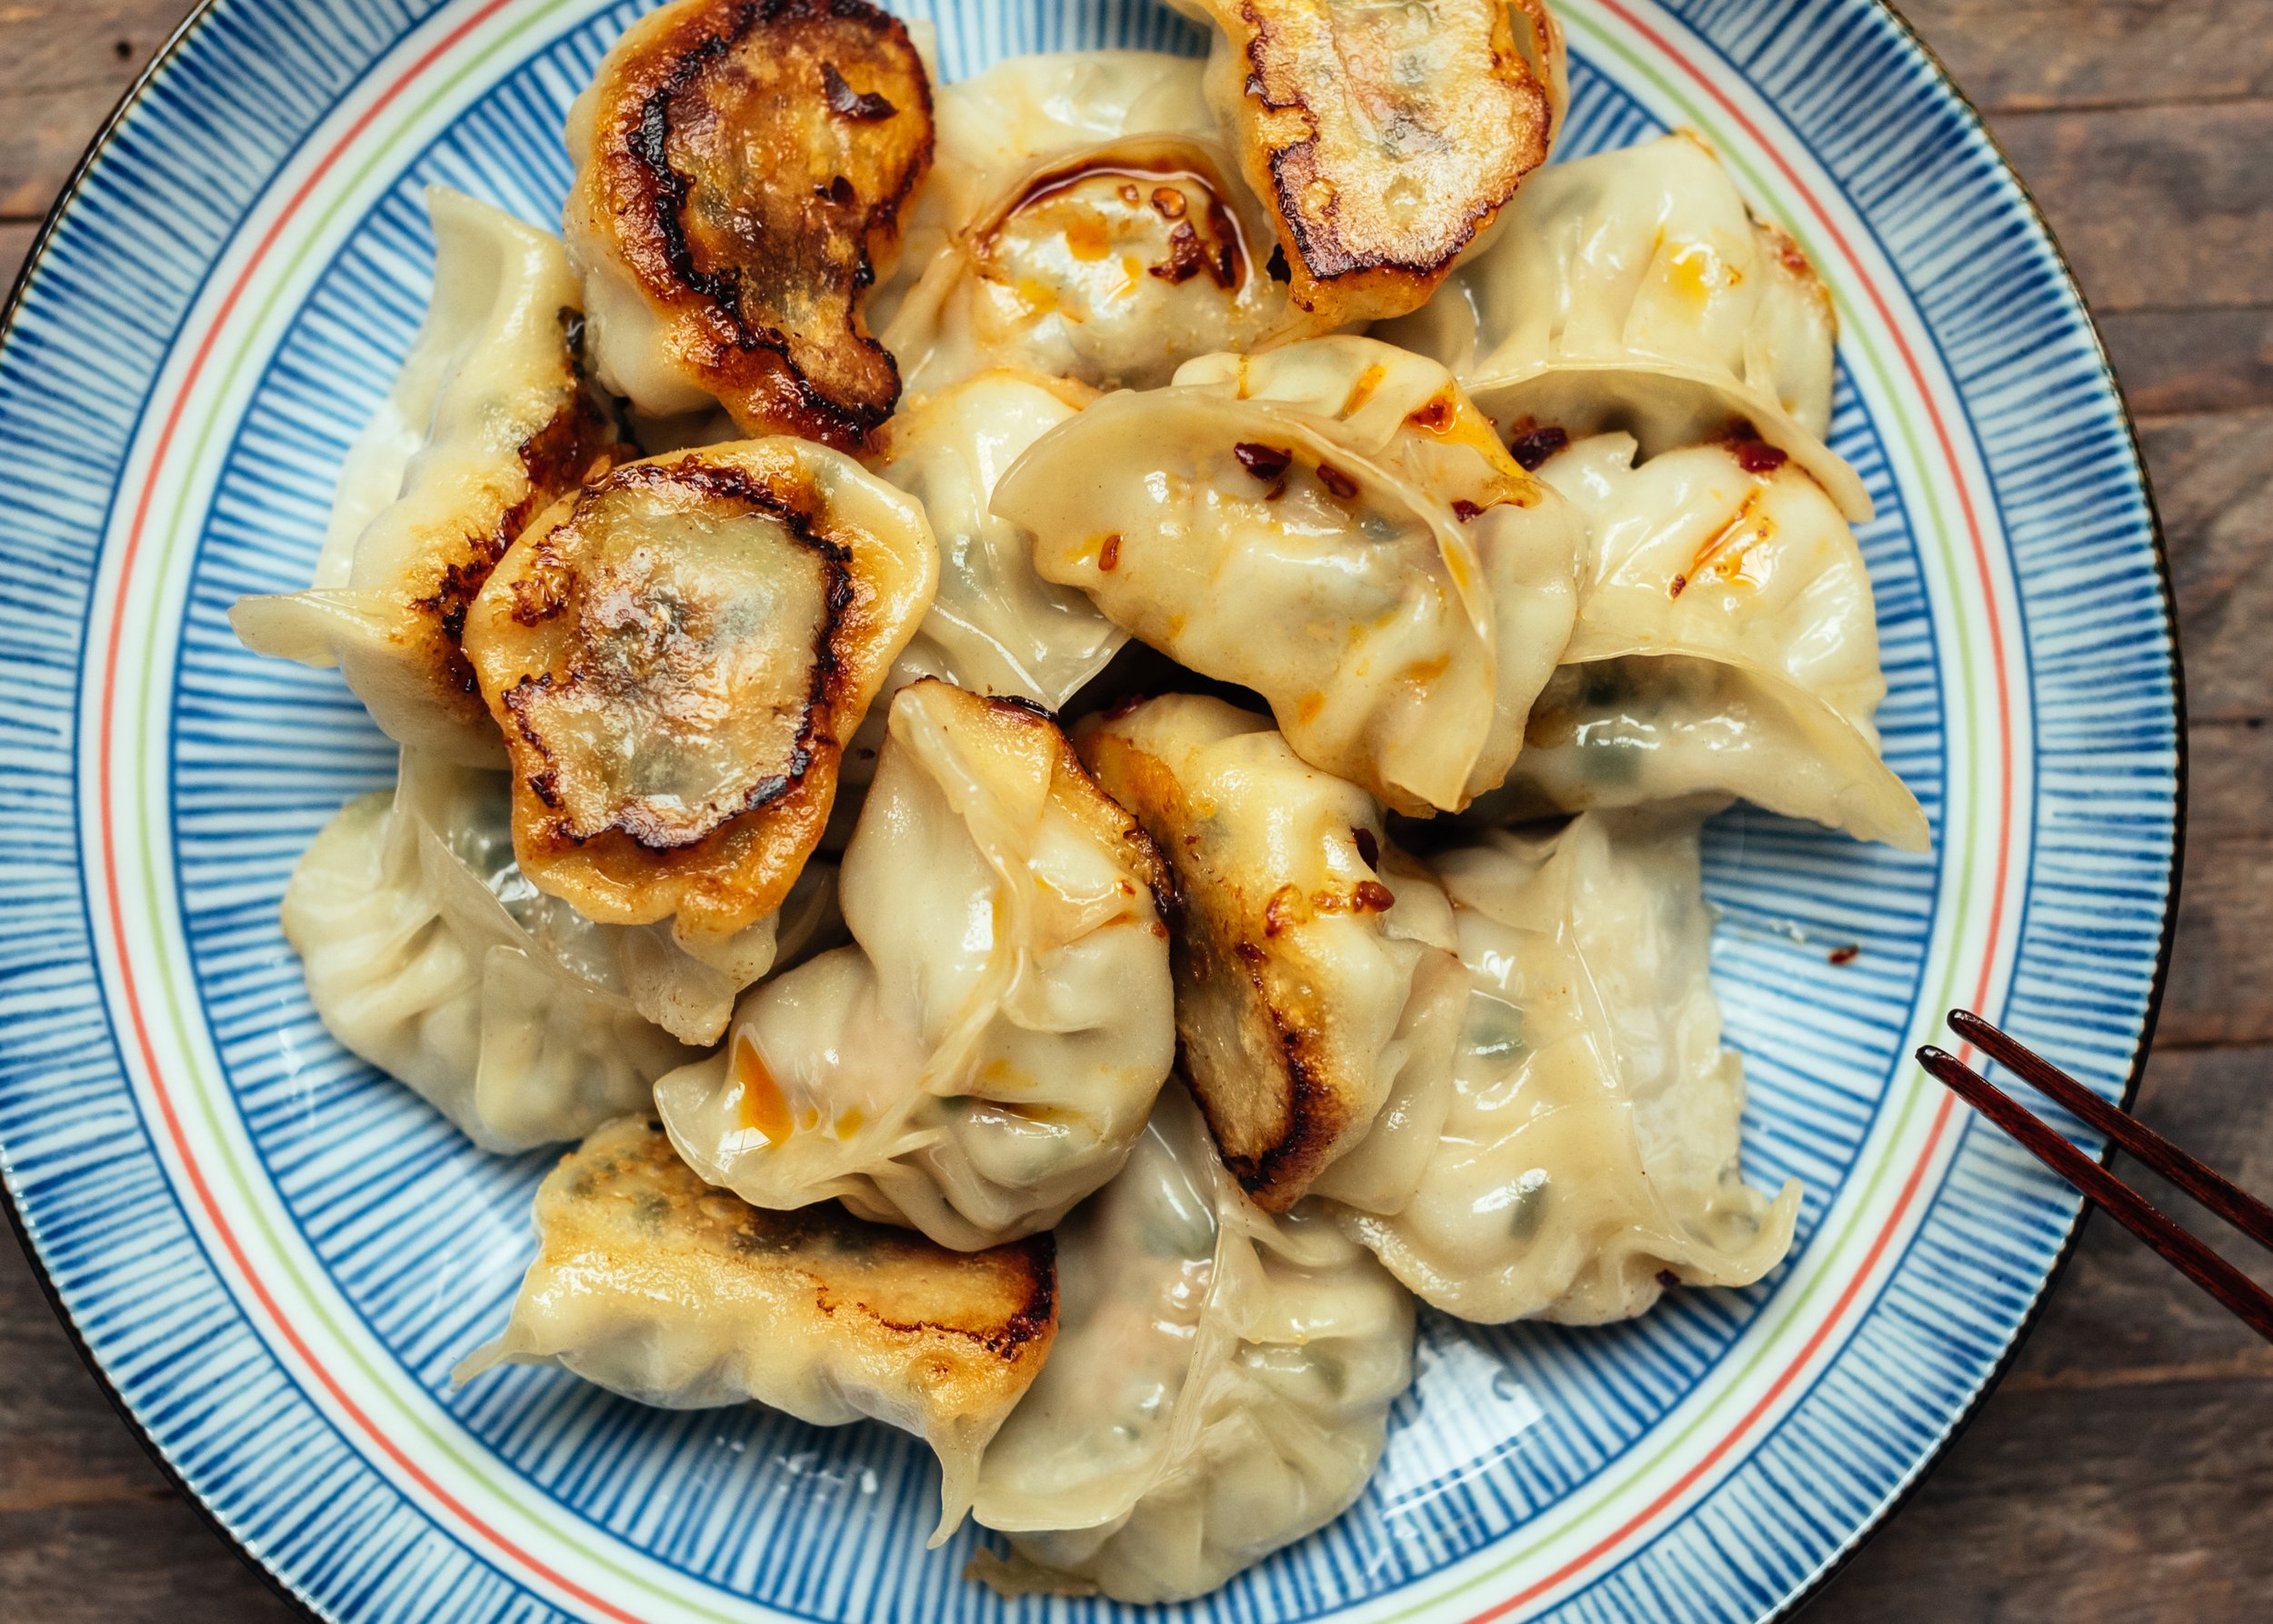
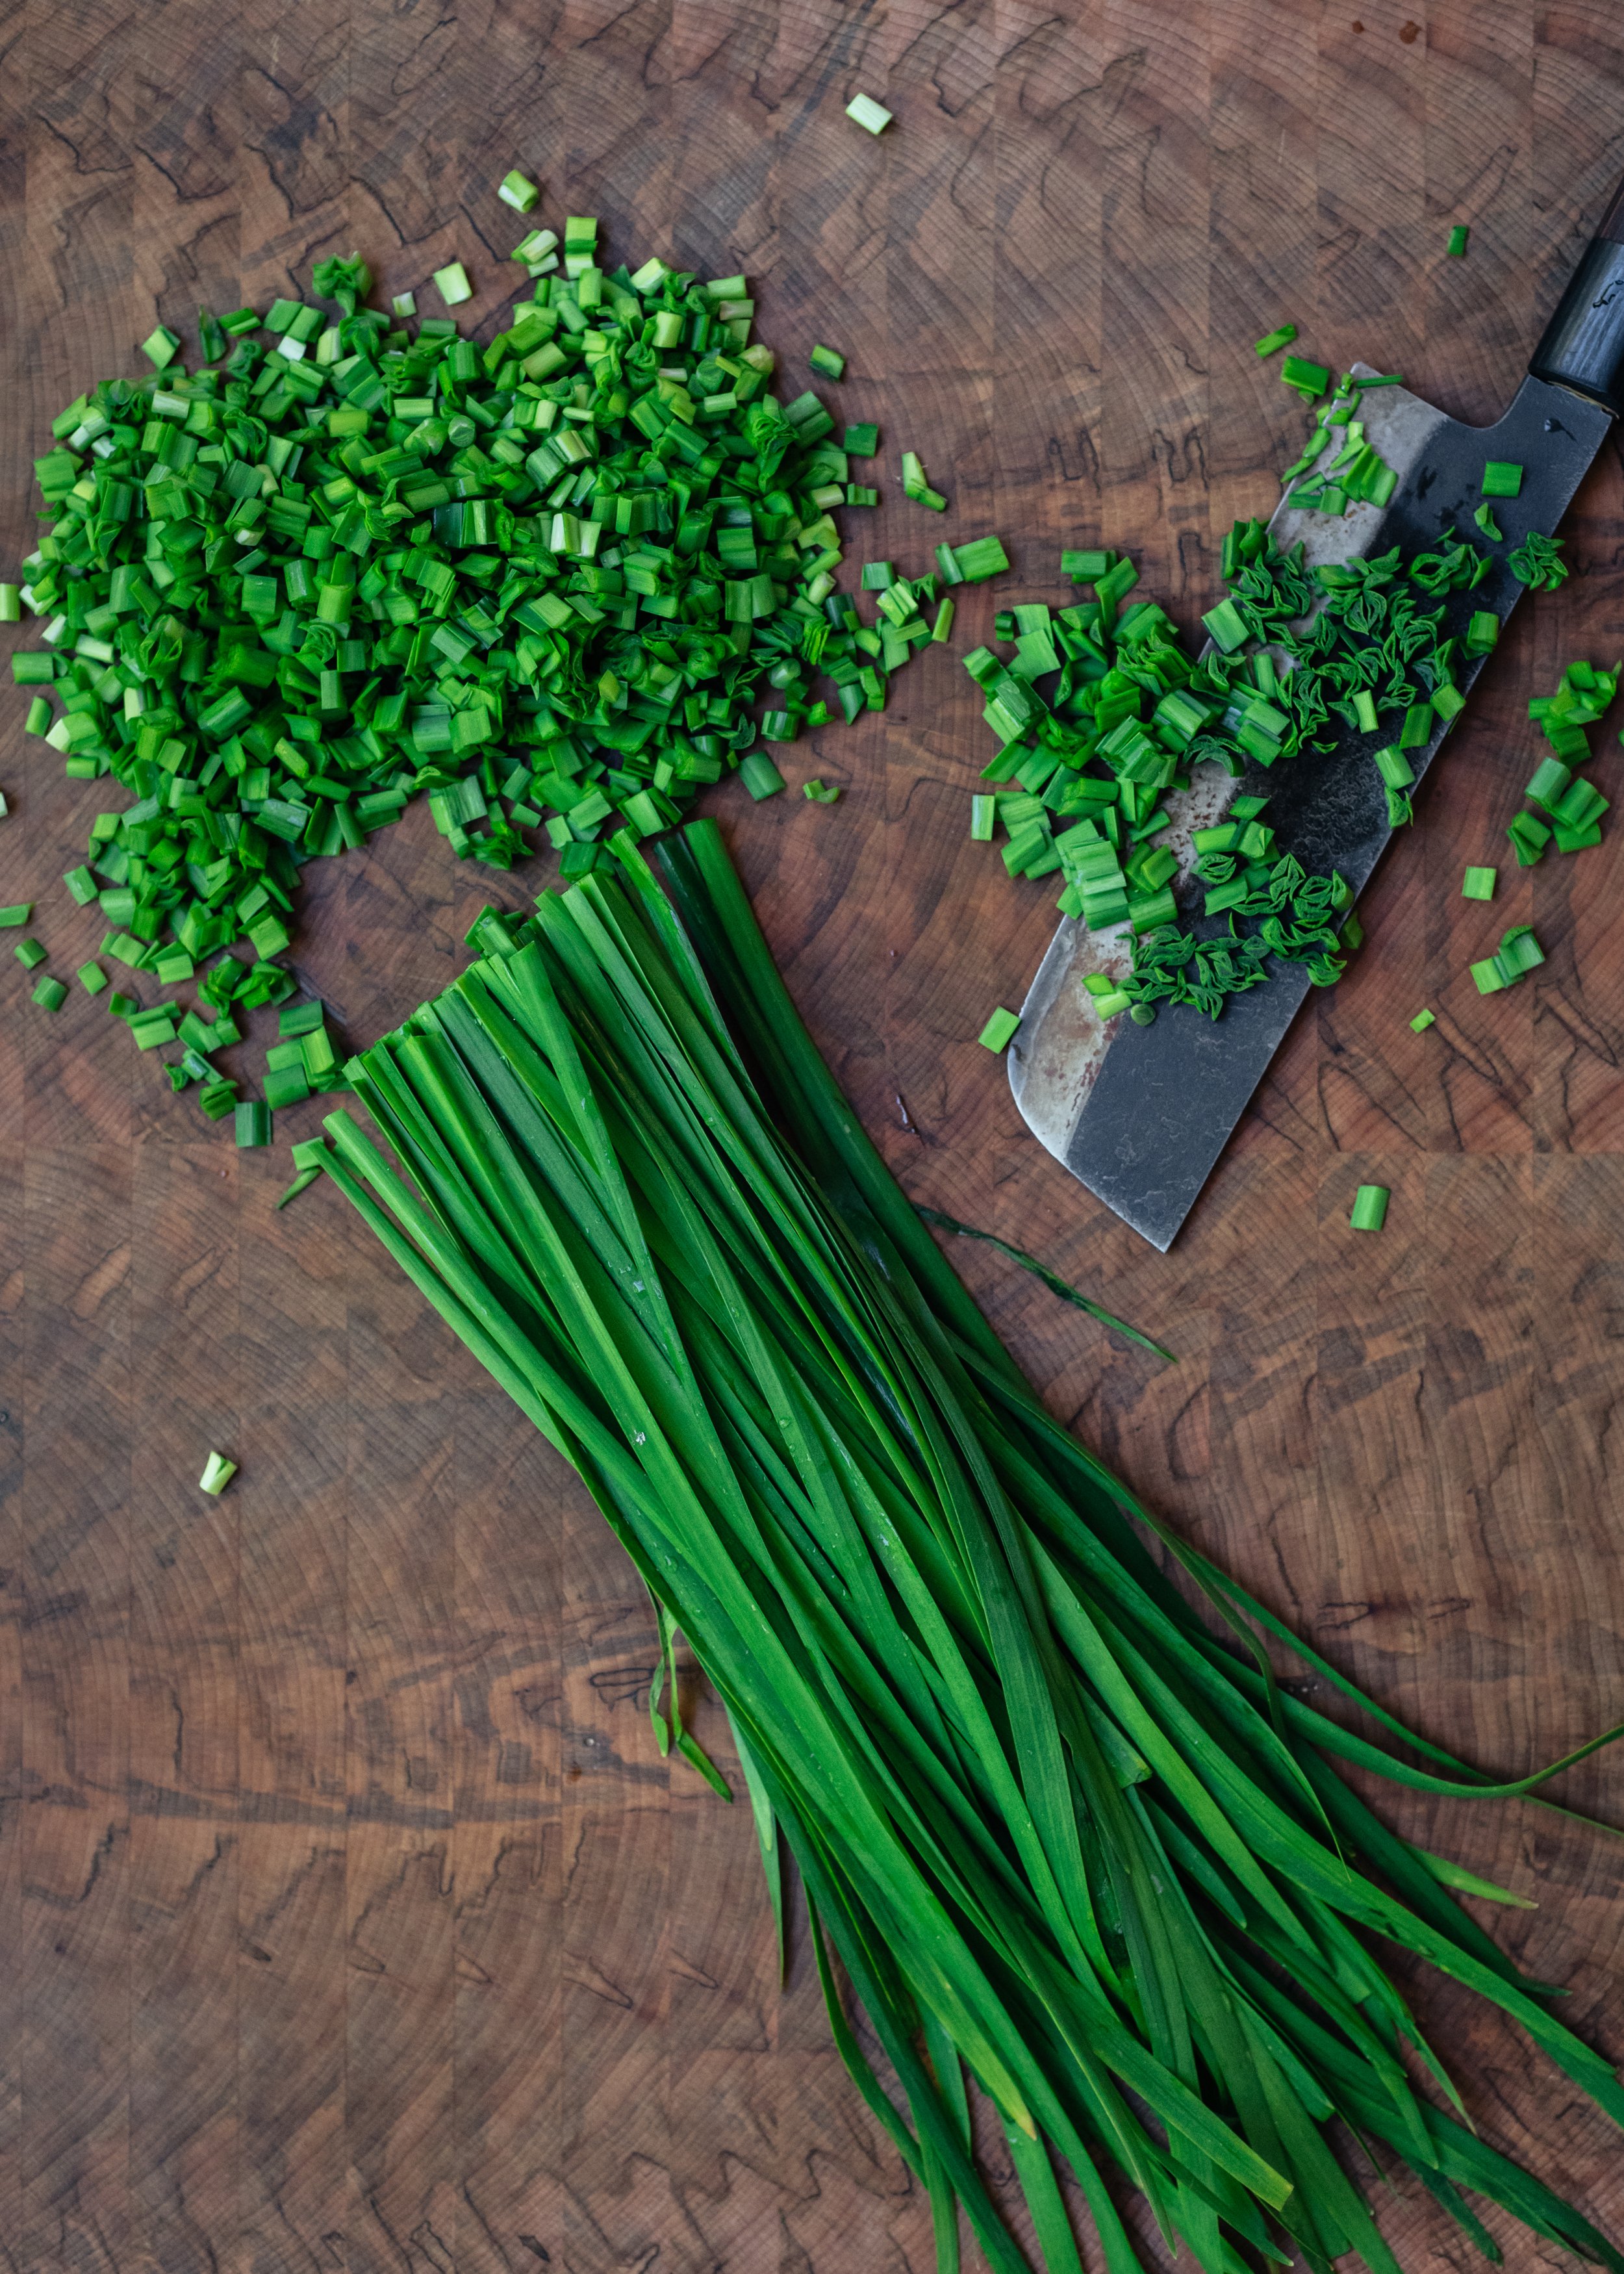
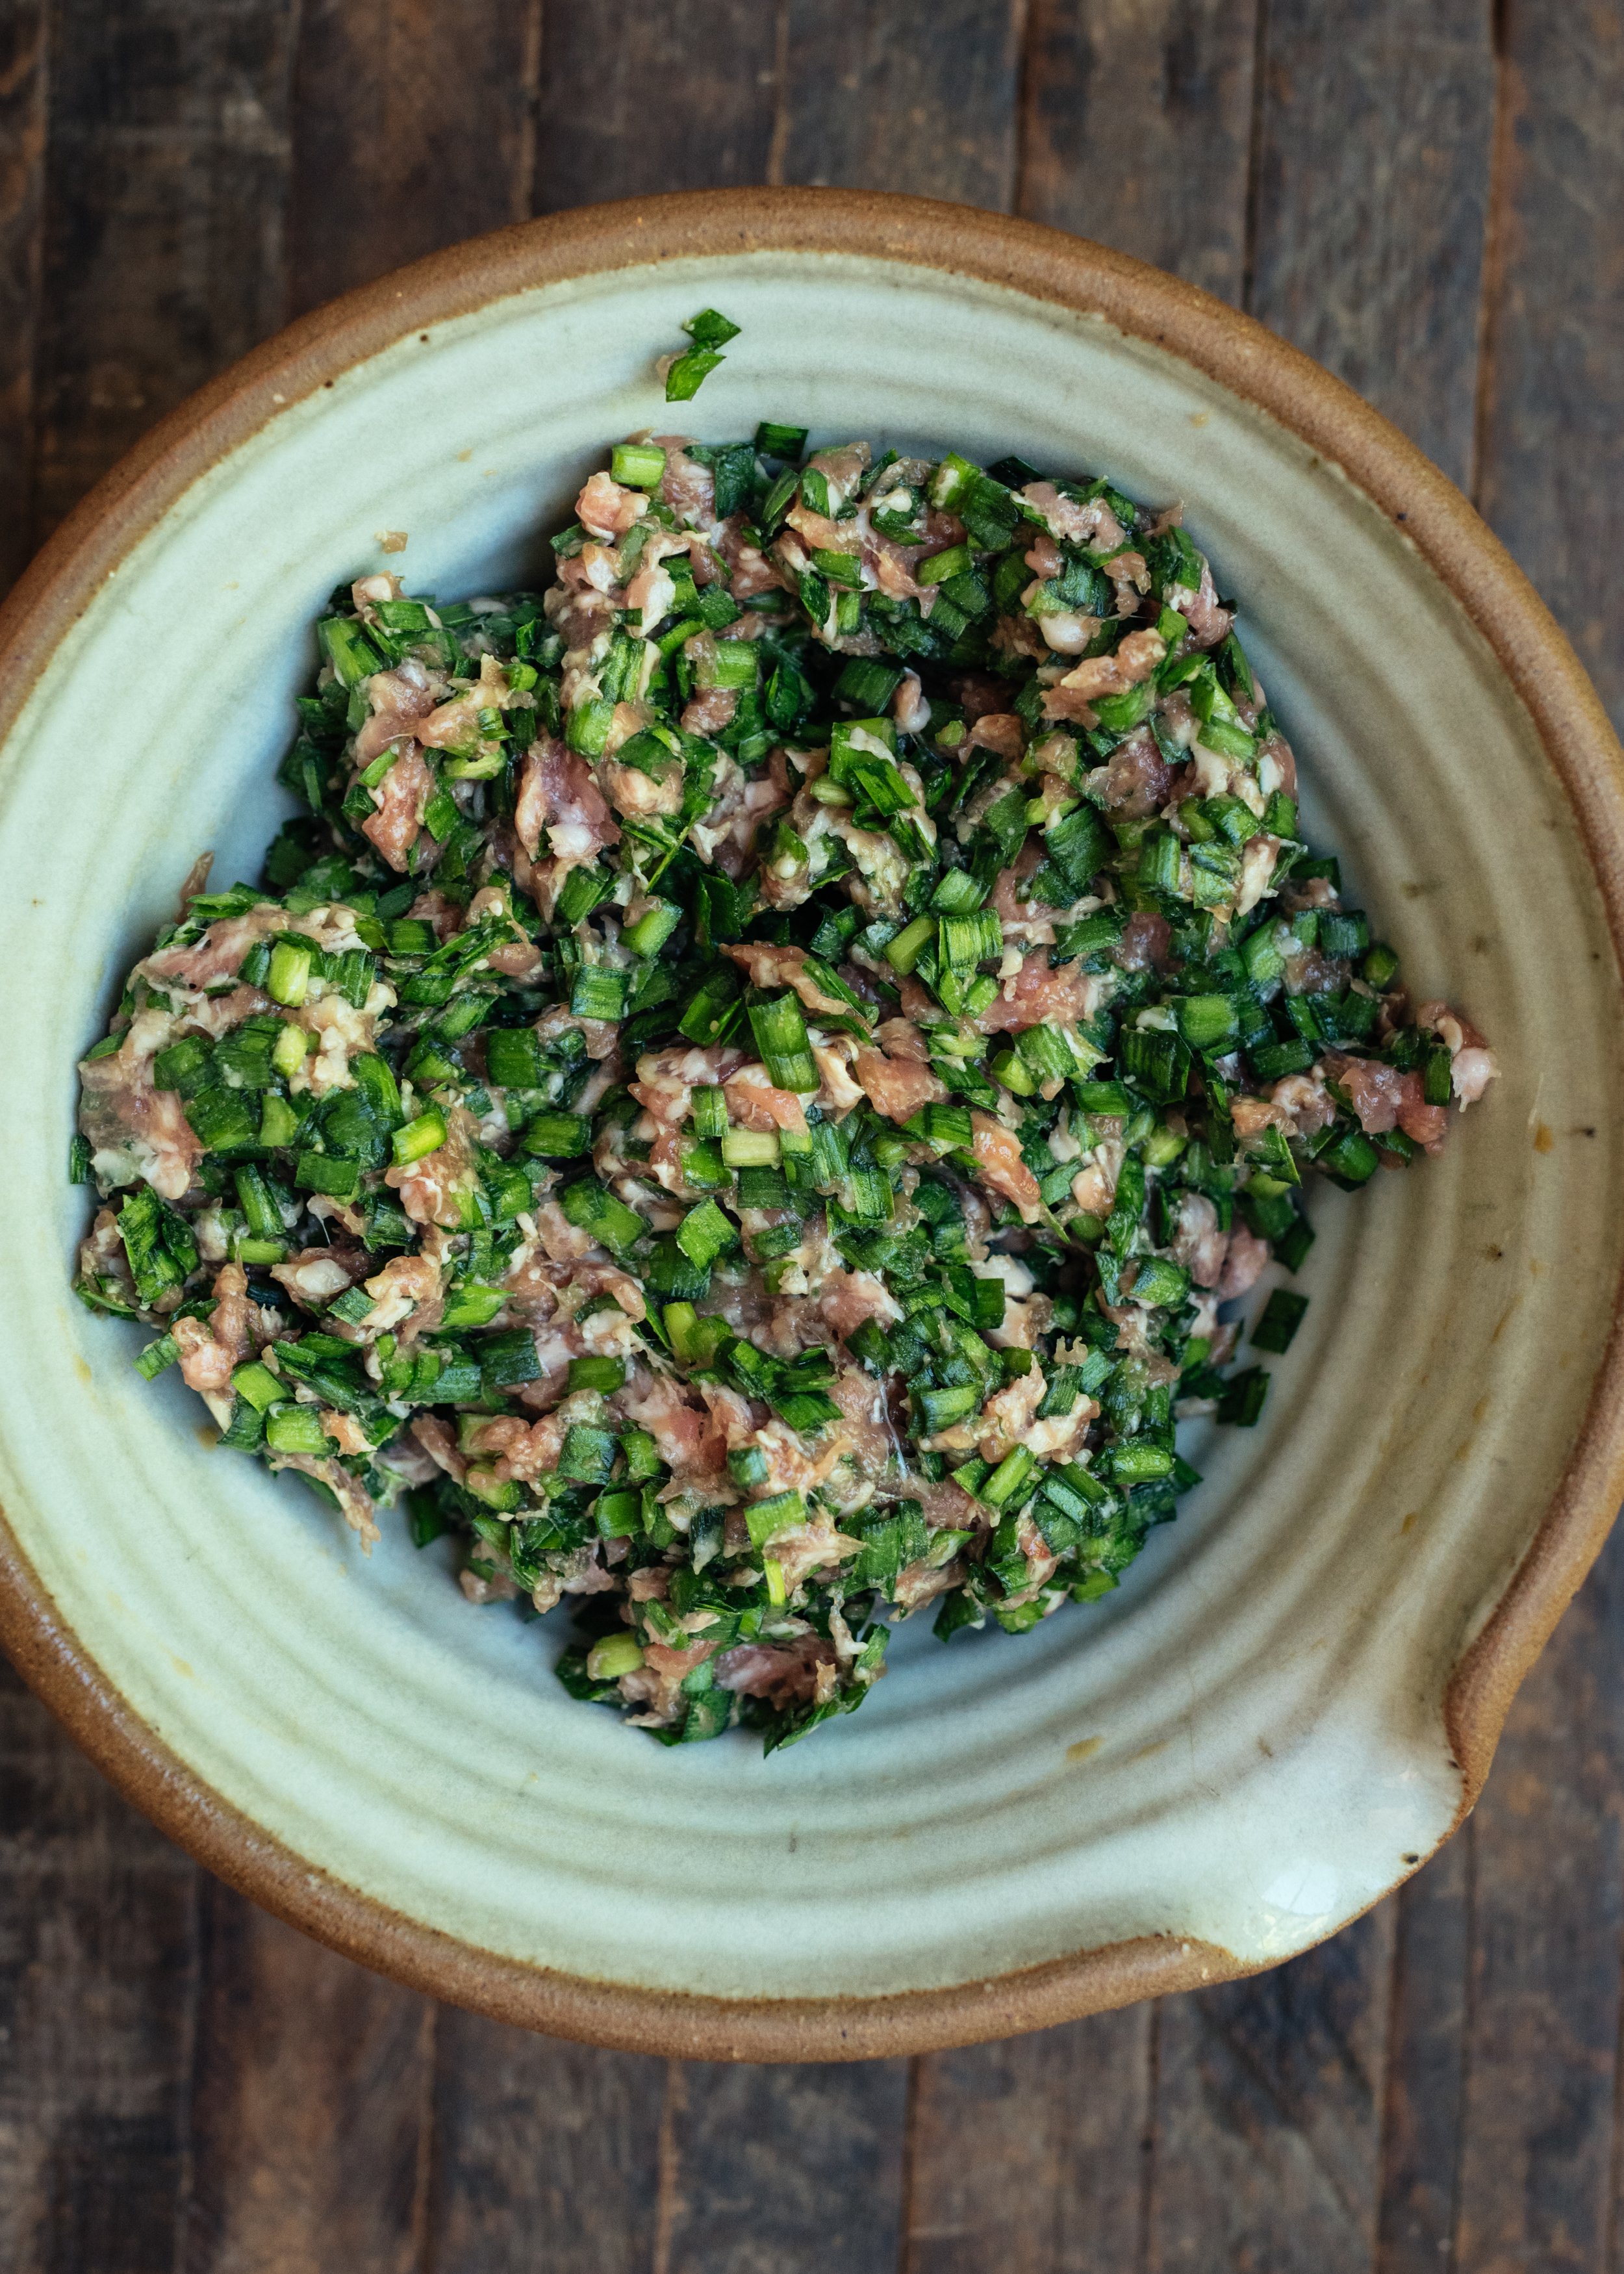
I call this Chinese Chives and Pork Dumplings my weeknight dumplings because as far as dumpling recipes go, they are the easiest of them all to make. The filling is quick because it is basically two ingredients - ground pork and Chinese chives - plus a few seasonings. Ground pork requires zero preparation unlike shrimp, for example, which require peeling. Chinese chives need only be chopped and tossed into the mixture versus bok choy or certain other leafy veggies that also require light sauté and/or squeezing out excess water vis à vis my family recipe for Shanghai Pork & Bok Choy dumplings (my absolute favourite, but more of a weekend project).

Chinese chives are different from the chives you get in the herb section used for garnish and finishing dishes. Chinese chives have long, tender blades that is green the entire length with slightly darker tips. Their flavour is leek-y and a bit garlicky, often compared with ramps. They add a delicious and unique taste and aroma to the dumpling filling. The juicy ground pork and fragrant Chinese chives in these Chinese Chives and Pork Dumplings are such a classic combo for dumplings and always hits the spot.
🎥 Watch video for Chinese Chives and Pork Dumplings:
Moreover, we use store-bought wrappers for this weeknight fix! I’ll be honest, I’m not a fan of the preservatives present in almost all store-bought dumpling wrappers. But making and rolling out from-scratch wrappers is an endeavour many people have no time for nor want any part of. That’s okay. Making your own filling and wrapping your own dumplings at home is achievement enough and will be so satisfying to eat.
If you need a tutorial for pleating dumplings, watch my IG video 🎥 HOW TO: CLASSIC PLEAT DUMPLINGS VIDEO TUTORIAL. In a pinch or in a hurry, you can also simply fold your dumplings into half moons by folding the round wrapper in half over the filling and sealing the edges.
Make sure to read my TWO TIPS for perfect dumpling filling below and follow my advice - they’re simple yet make all the difference in the finished dumplings. Let me know what you think or ask me any questions you have in the comments below.
Eat well and be well,
Sonia x
Two tips for perfect dumpling filling:
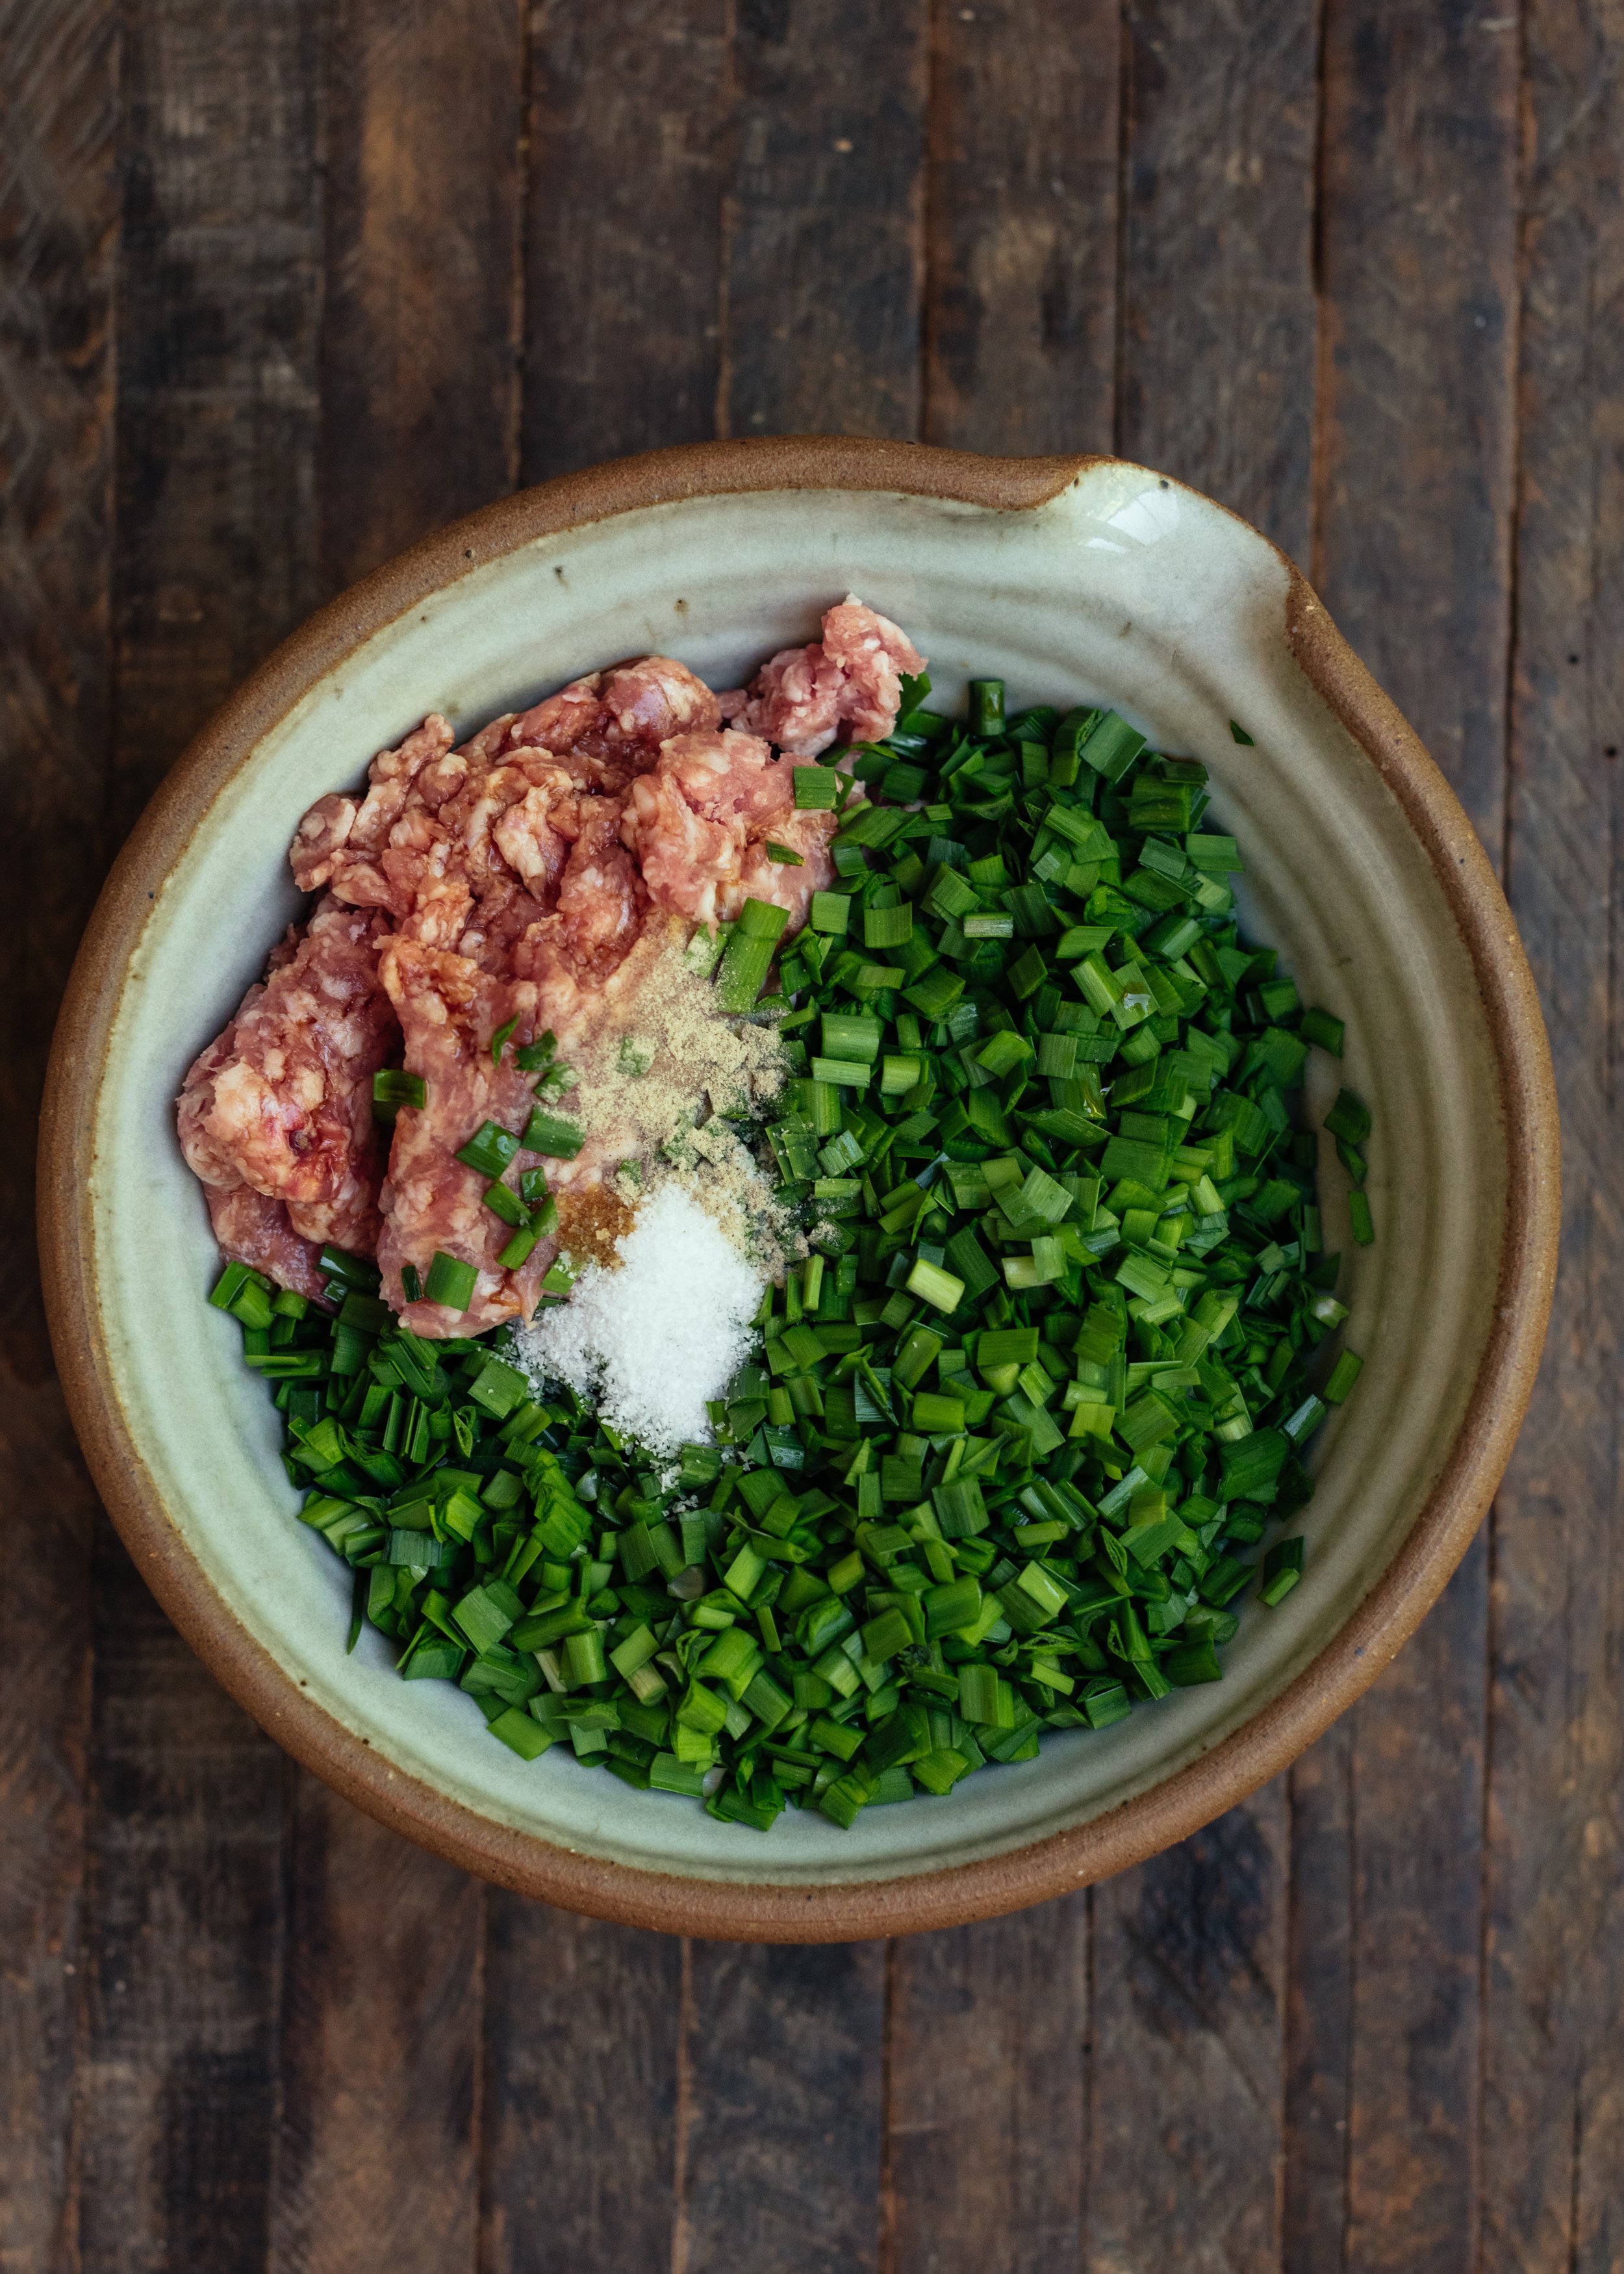
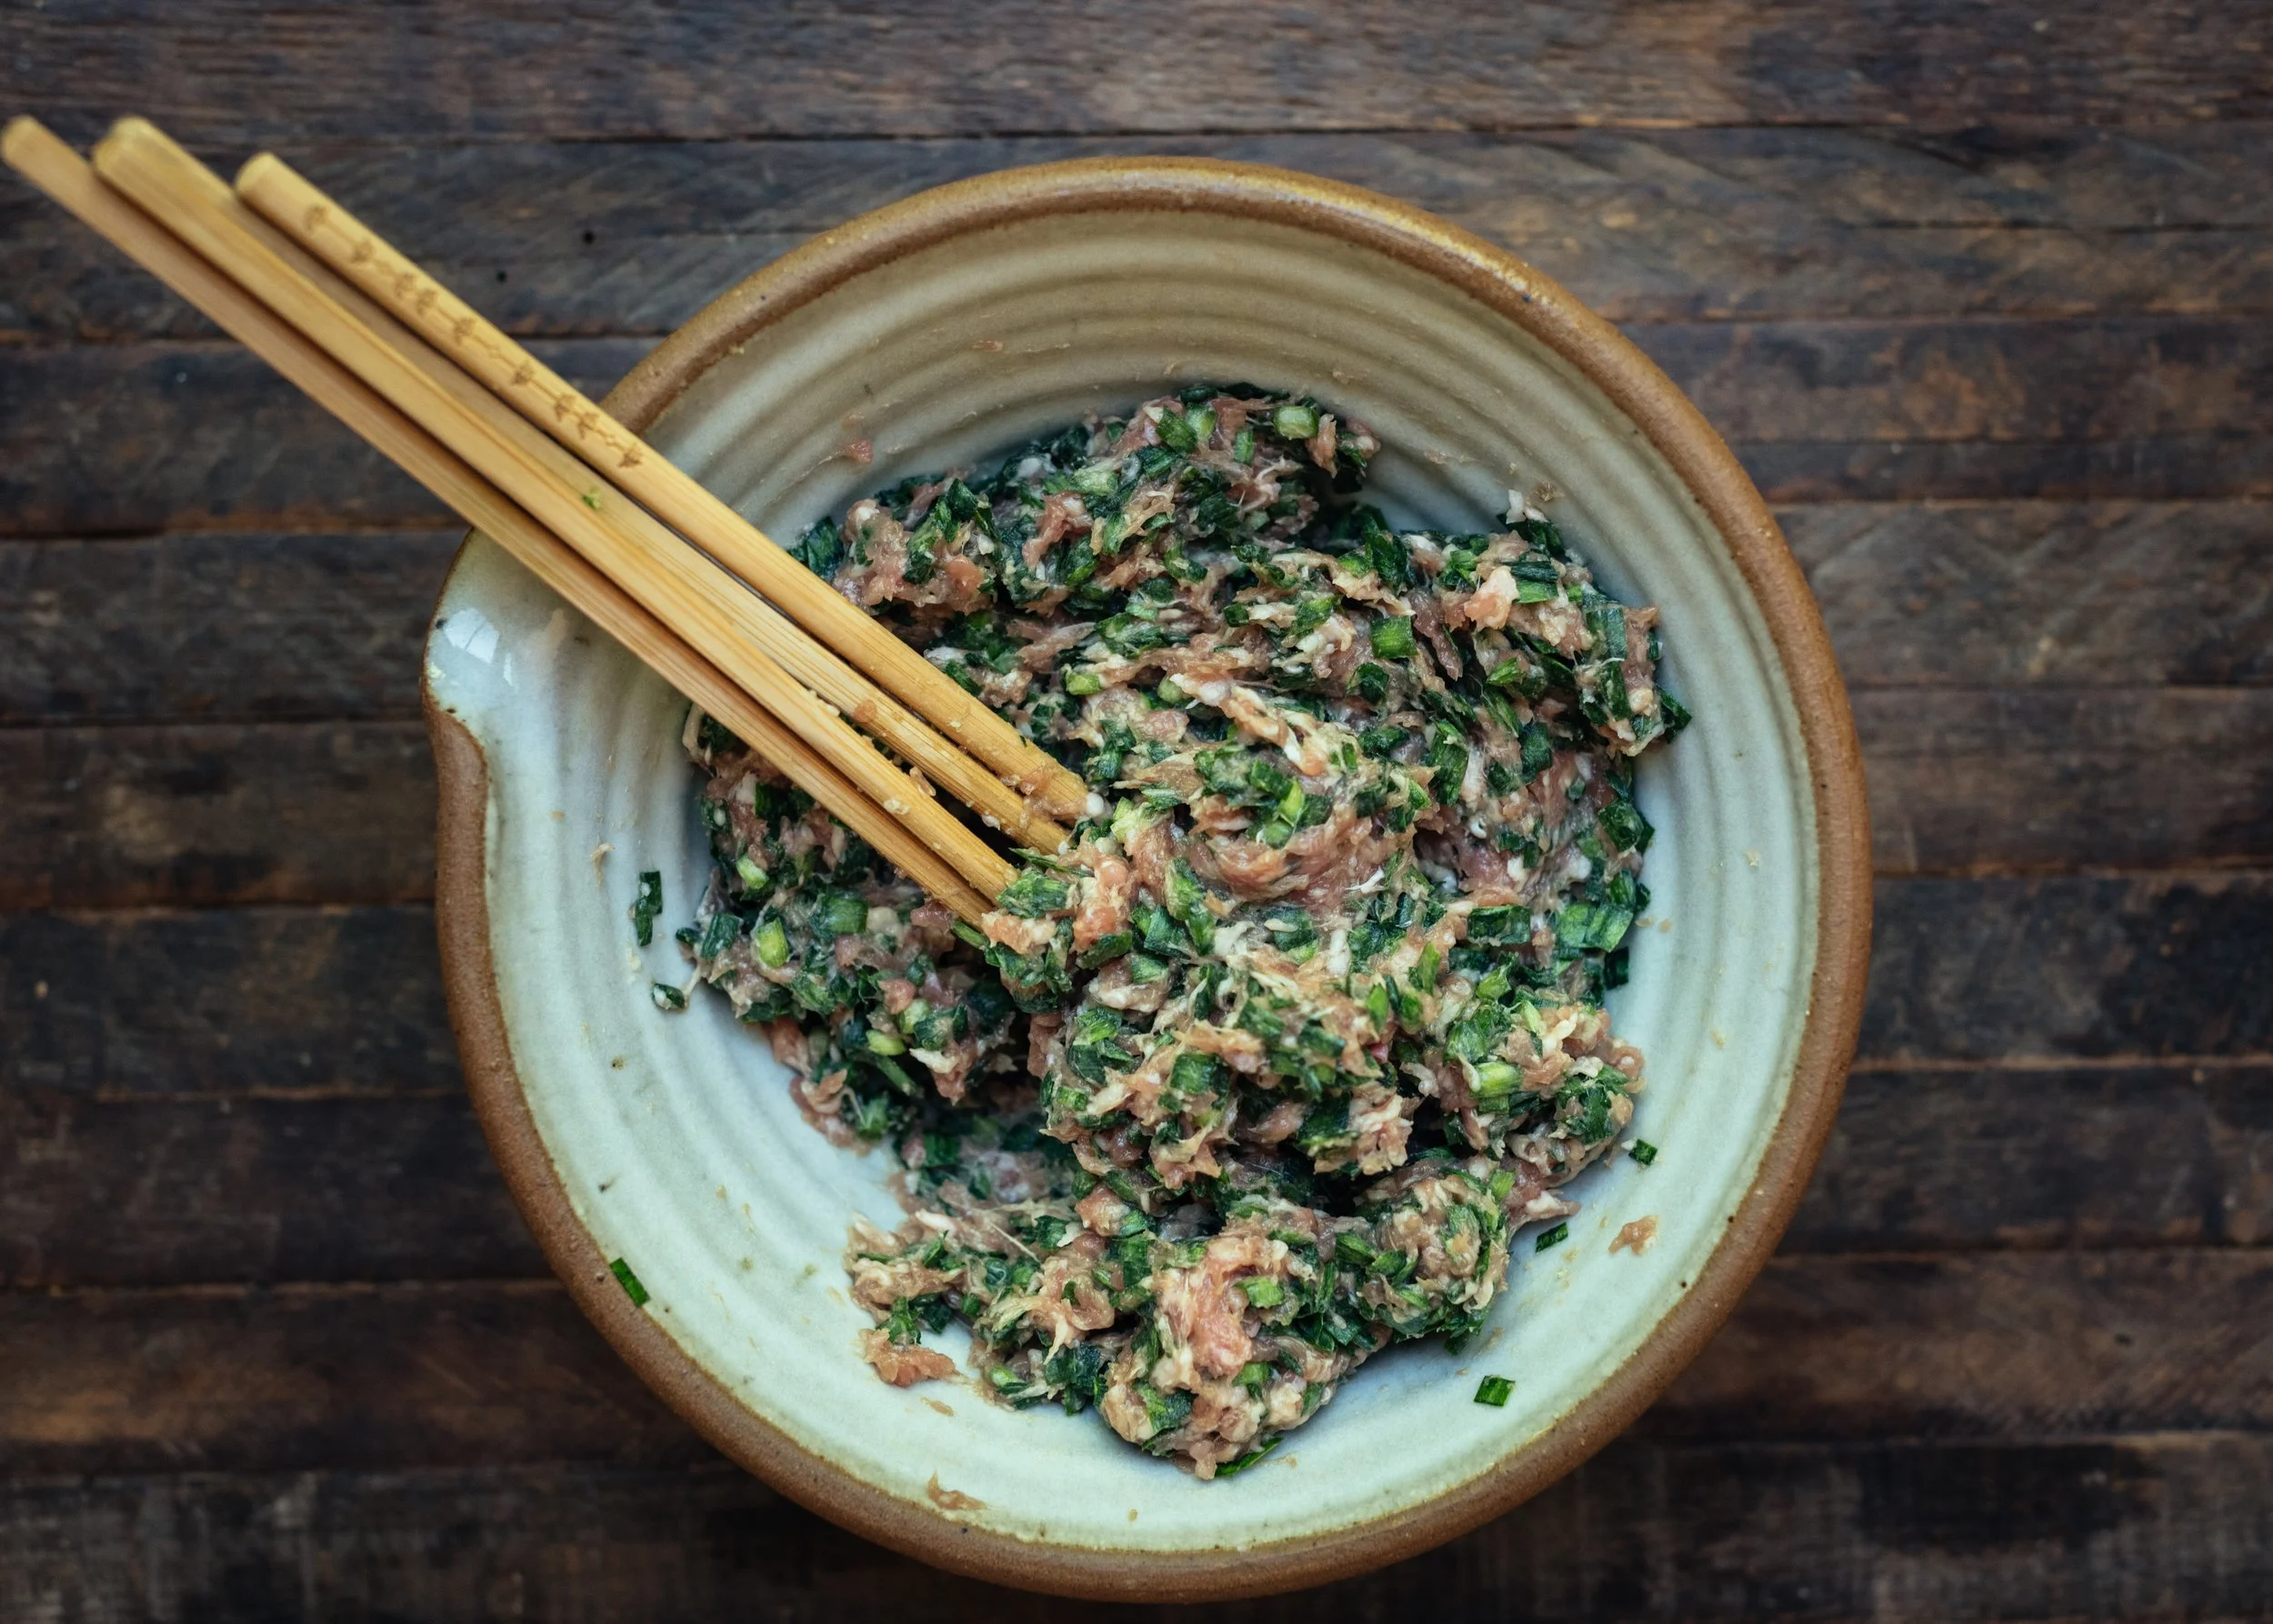
Mix filling vigorously. Once you’ve combined filling ingredients (hands are the best tool for this step), take 2 pairs of thick wooden chopsticks held together in your hand (like you’re stirring a cauldron) and mix with as much vigour as you have, until the filling goes from a loose to pasty consistency. This step tenderizes the meat and pulls everything together to form a tighter filling which has a bouncier mouthfeel when you bite into a dumpling. This is our family secret from my dad and his mother!
Taste the filling before wrapping the dumplings. There is no bigger disappointment than biting into a dumpling and discover it is under- or over-seasoned after you’ve folded a hundred of ‘em! Take 1 tsp of filling a microwave ~20-30 seconds to cook. Taste and adjust seasoning e.g. salt, soy sauce, sugar to taste. Tip: Keep in mind to under-season a touch if you plan to eat the cooked dumplings in a salty dipping sauce.
You may also be interested in these recipes:
Recipe Notes for Chinese Chives and Pork Dumplings:
Chinese chives are different from the chives you get in the herb section used for garnish and finishing dishes. Chinese chives have long, tender blades that is green the entire length with slightly darker tips. Their flavour is leek-y and a bit garlicky, often compared with ramps. They add a delicious and unique taste and aroma to the dumpling filling.
Shaoxing wine is a rice-based cooking wine famously from Shaoxing, China but there are versions made outside Shaoxing as well (I often get a Taiwanese “Shaohsing Wine”). Shaoxing wine is a clear, medium brown liquid that is aromatic, slightly sweet and fragrant. It is used in Chinese cooking to add nuanced and complex flavour. If you can’t find Shaoxing wine, it can be substituted with dry cooking sherry or omit. It’s best to buy it at a Chinese grocery store. I have no favorite brrand, They are generally inexpensive ($10 give or take) so choose the most expensive bottle in the aisle and you should be good.
Chinese Chives and Pork Dumplings
Recipe makes 42-45 dumplings. Serves 3-4 depending on appetite. I always double this recipe for my family of 4 with leftover to freeze.

Chinese Pork and Chive Dumplings
Very classic filling, very delicious and very easy to make. Whether you’re new to dumpling-making or an aficionado, this Chinese Pork and Chive Dumplings recipe should be a mainstay in your dumpling repertoire.
Ingredients
Instructions
- Make filling: Place ground pork, chopped chives, soy sauce, white pepper powder, sugar and salt in a large mixing bowl. Mix first by hand until well combined. Next, take 2 pairs of thick wooden chopsticks held together in your hand (like you’re stirring a cauldron) and mix with as much vigour as possible until the filling goes from a loose to pasty consistency. This step tenderizes the meat and pulls everything together to form a tighter filling which has a bouncier mouthfeel when you bite into a dumpling. You can make the filling up to a day in advance and keep it tightly wrapped up in the refrigerator until you’re ready to wrap the dumplings.
- Wrappers: I use store-bought wrappers for quick dumpling fixes (as pictured in this post). To make your own dumpling wrappers, see my post How To Make Dumpling Wrappers From Scratch (with Step-by-Step Photo Tutorial and Video).
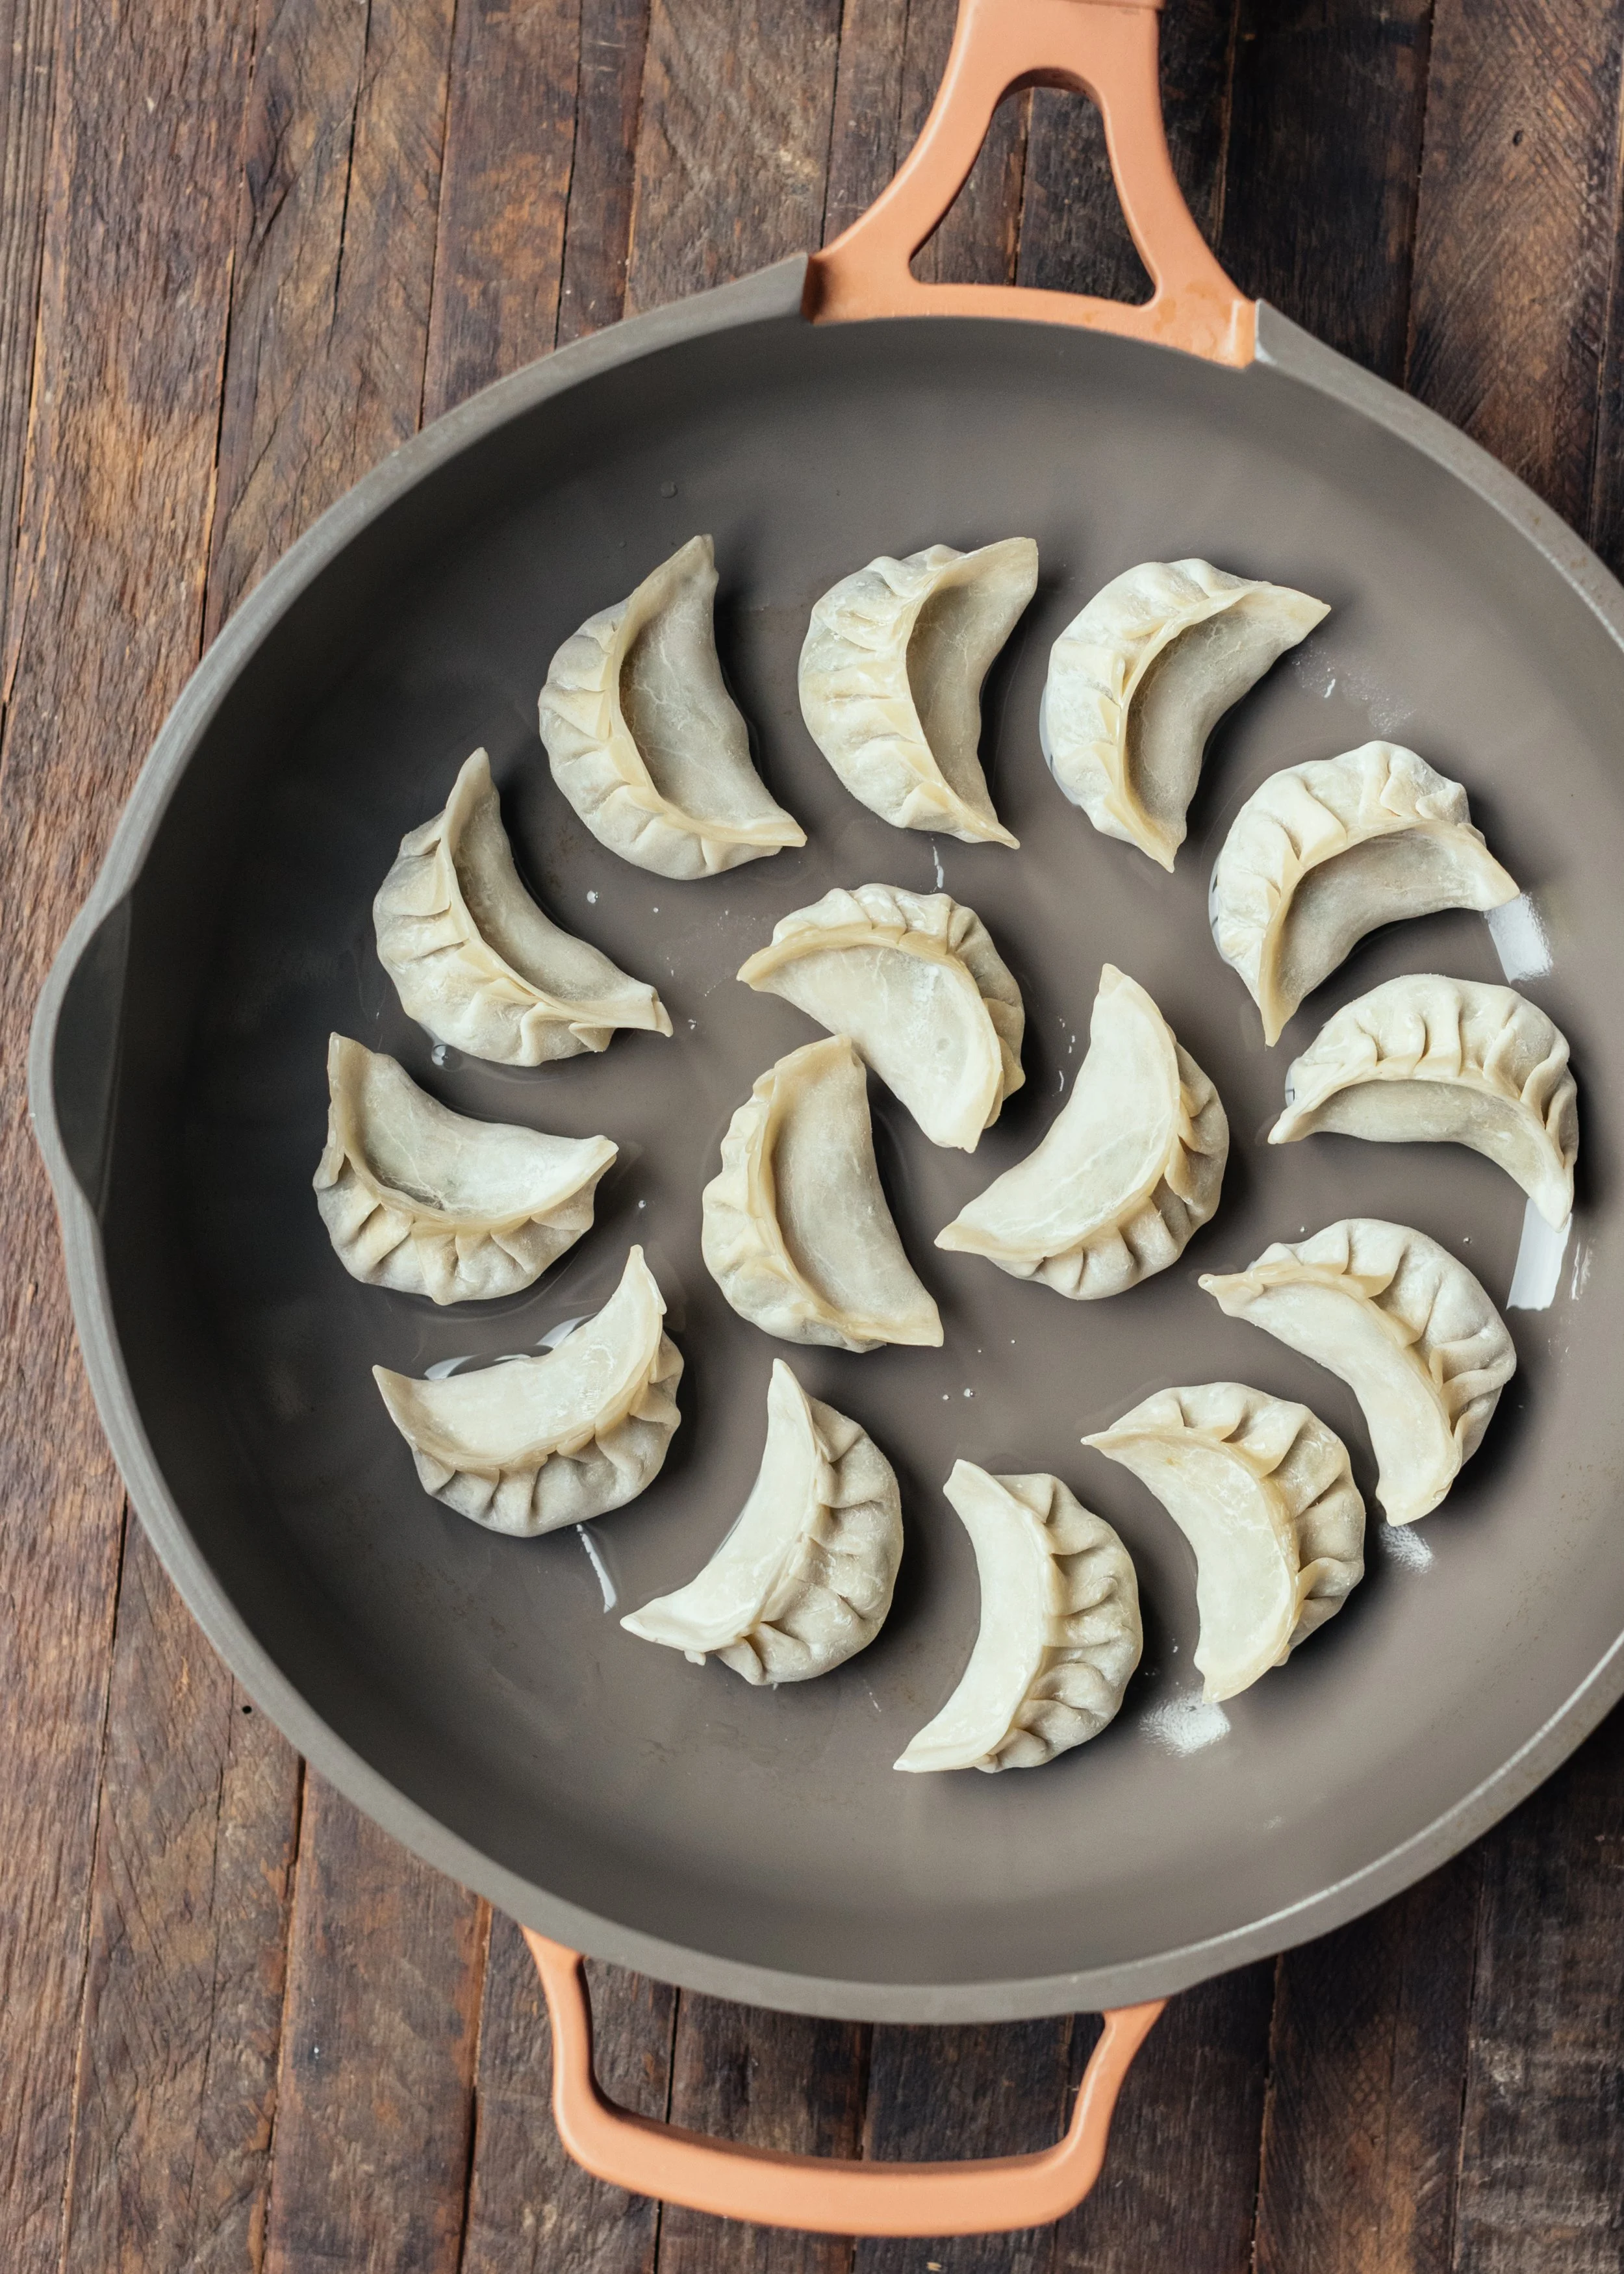
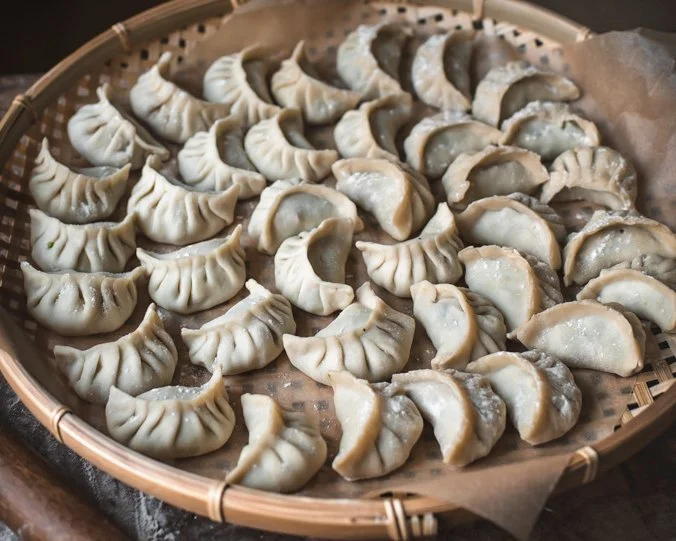
- Wrap dumplings: Set out two parchment-lined baking sheets to hold the dumplings. Set out wrappers, bowl of filling, a tablespoon and a small dish of cold tap water for sealing edges. Place 1 tbsp of filling in the center of the wrapper, leaving a border all around. Adjust amount of filling such that you get a plump dumpling but can still comfortably pleat/seal the edges without the risk of it bursting. Dab one finger in the water and run it around the entire outer edge of the wrapper to wet it (less wet for homemade wrappers). Wrap the dumpling as desired – there are a myriad of styles from simple to fanciful. The quickest and simplest way is to fold it in half, into a half moon. My personal go-to is the symmetrical classic pleat pictured in the blog post – see instructions below.
- HOW TO PLEAT:
- Start by attaching opposing ends of the wrap (i.e. the 12 o’clock to the 6 o’clock part of the circle) and press gently, so it sticks together there at just that point, but leaving the rest of the edges not touching. From that centre point, begin working outward down the left of the half-circle all the way to the outer end, folding a series of 3 to 5 slightly-overlapping pleats. The direction of the fold is always towards the centre. Pinch or tuck in the end to seal. Repeat the same pleats on the right side, from centre point to the outer end. Pinch or tuck in the end. Note that when making each pleat, only one side (the side facing away from you) of the wrapper is manipulated i.e. the inward facing side of the wrapper does not move.
- Place dumplings on parchment-lined baking sheet, not touching each other, and continue with the rest. Depending how quick you are, you may want to refrigerate some as you go since we are using raw meat filling. Cover with dry kitchen towel to refrigerate. Don’t use plastic wrap which collects moisture and can make dumplings soggy. Alternatively you can freeze if you’re planning to anyway – see freezing instructions below.
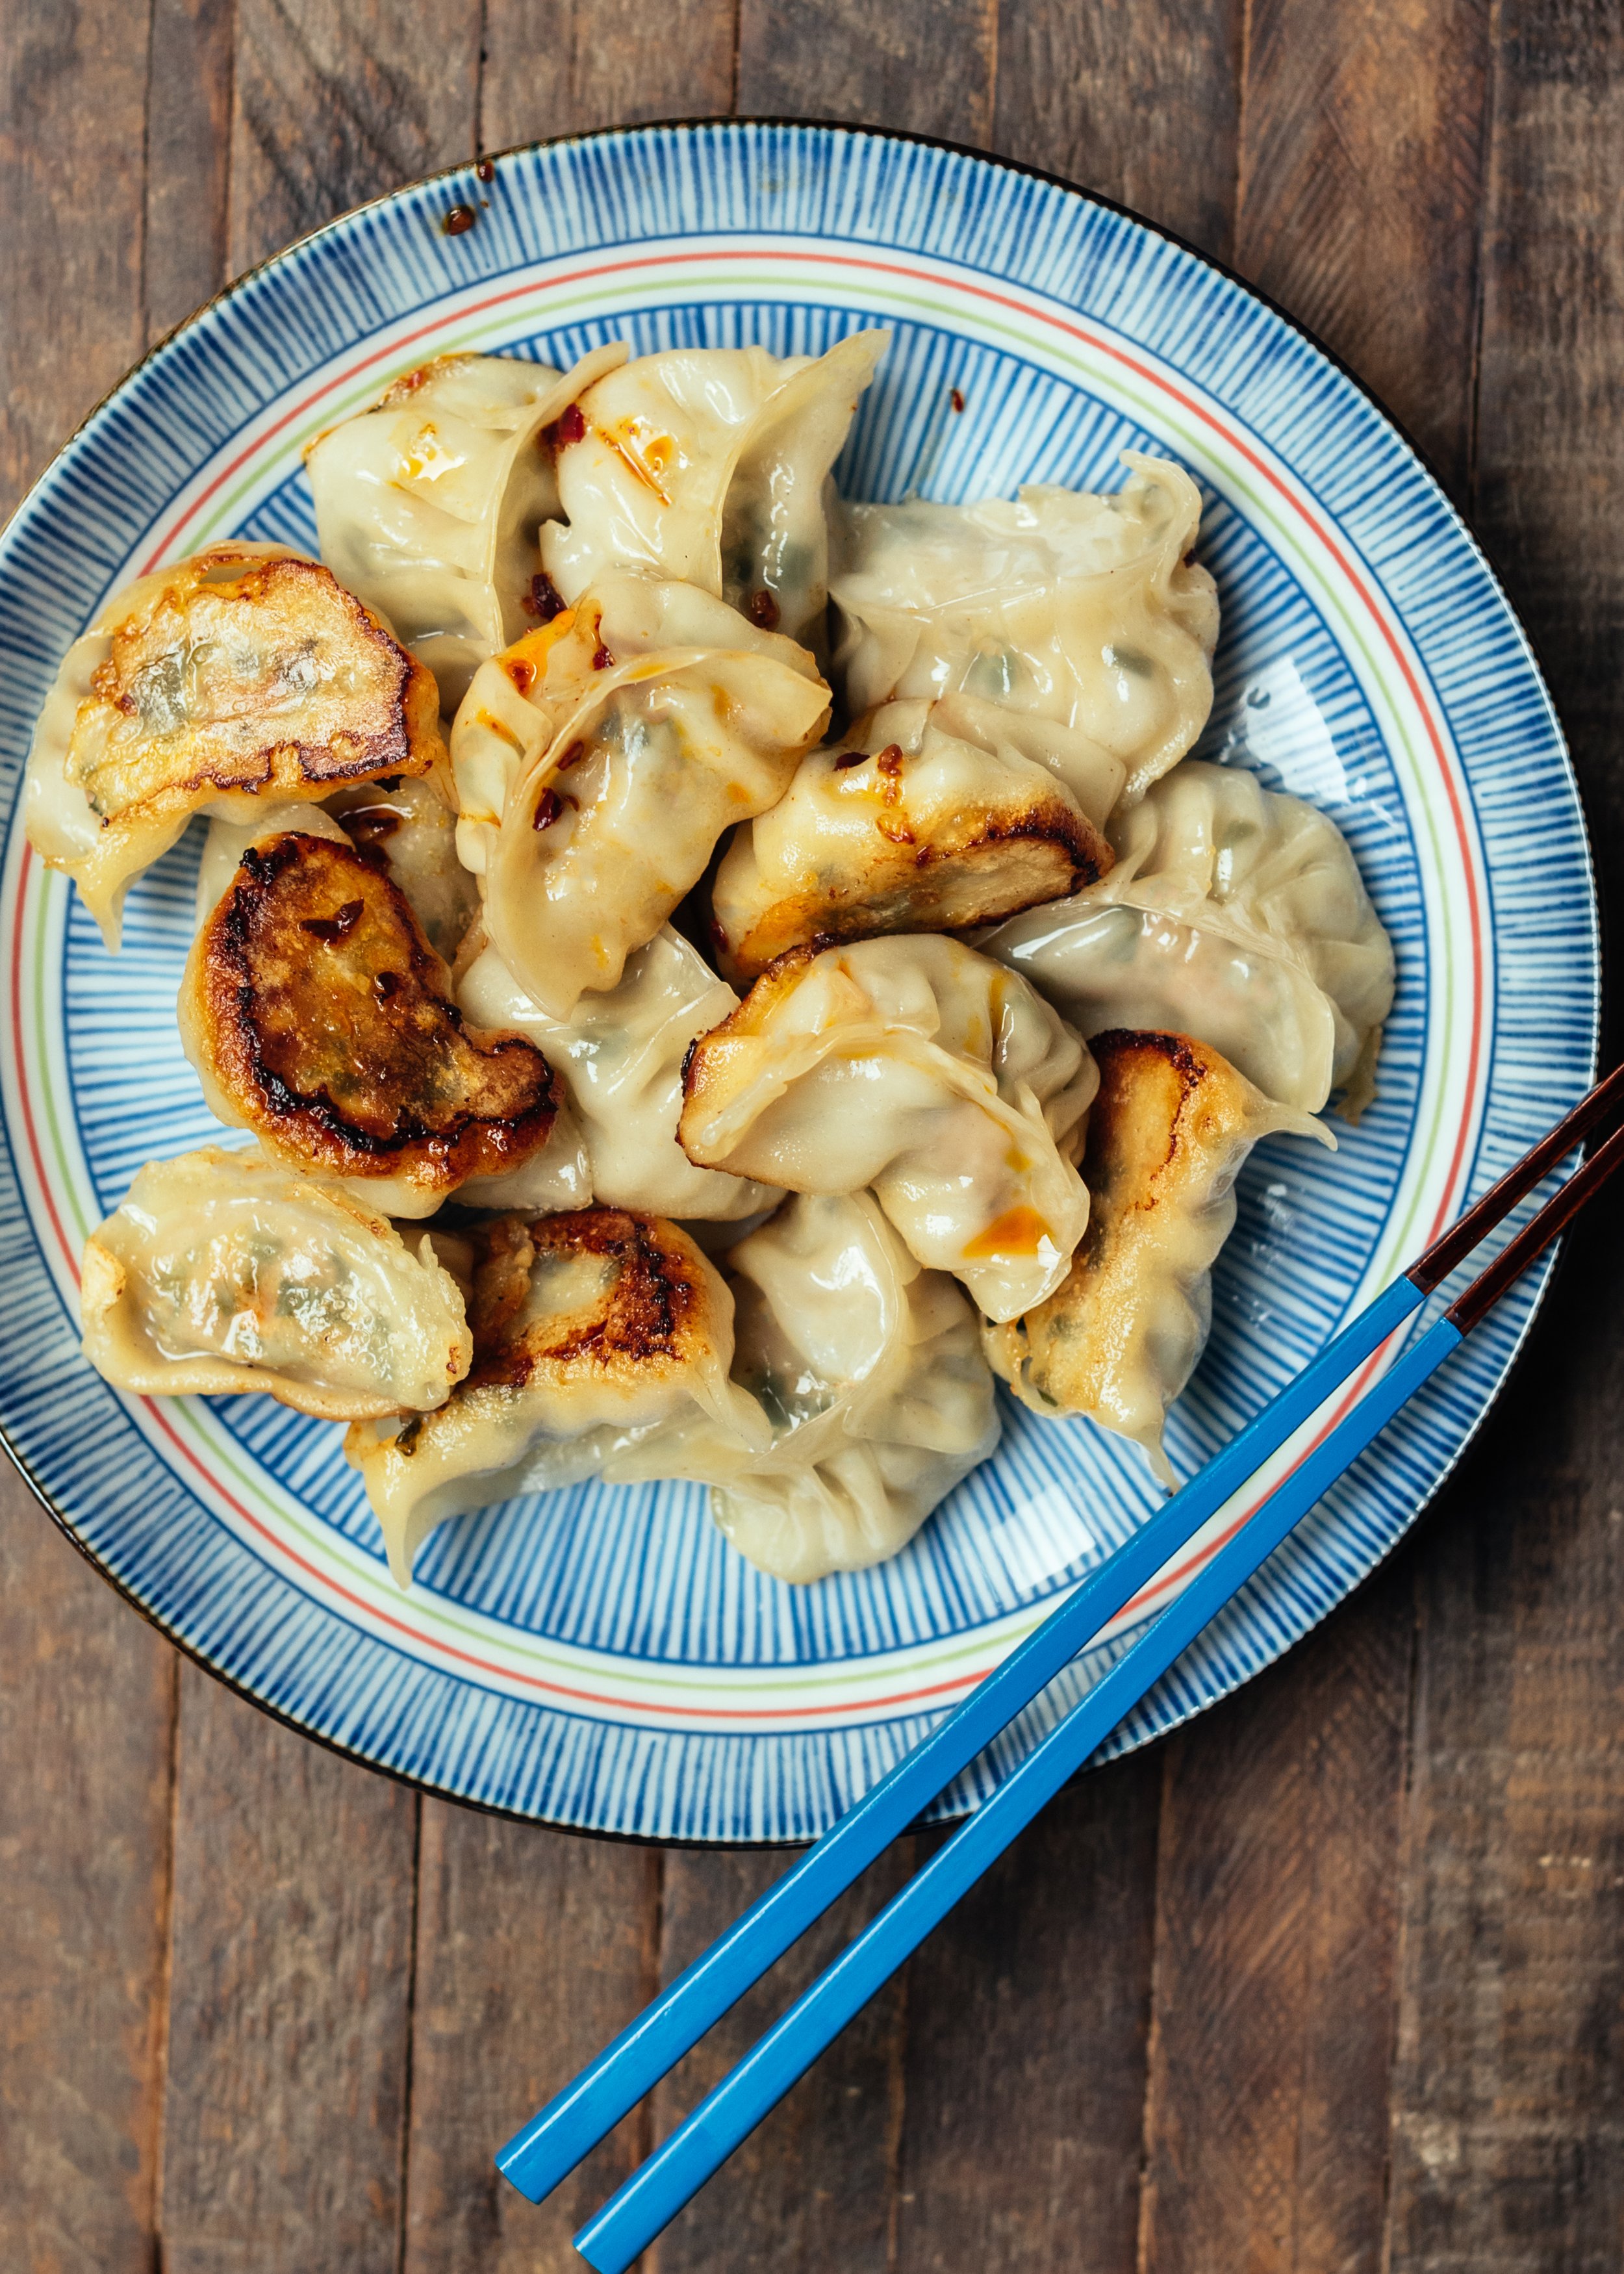
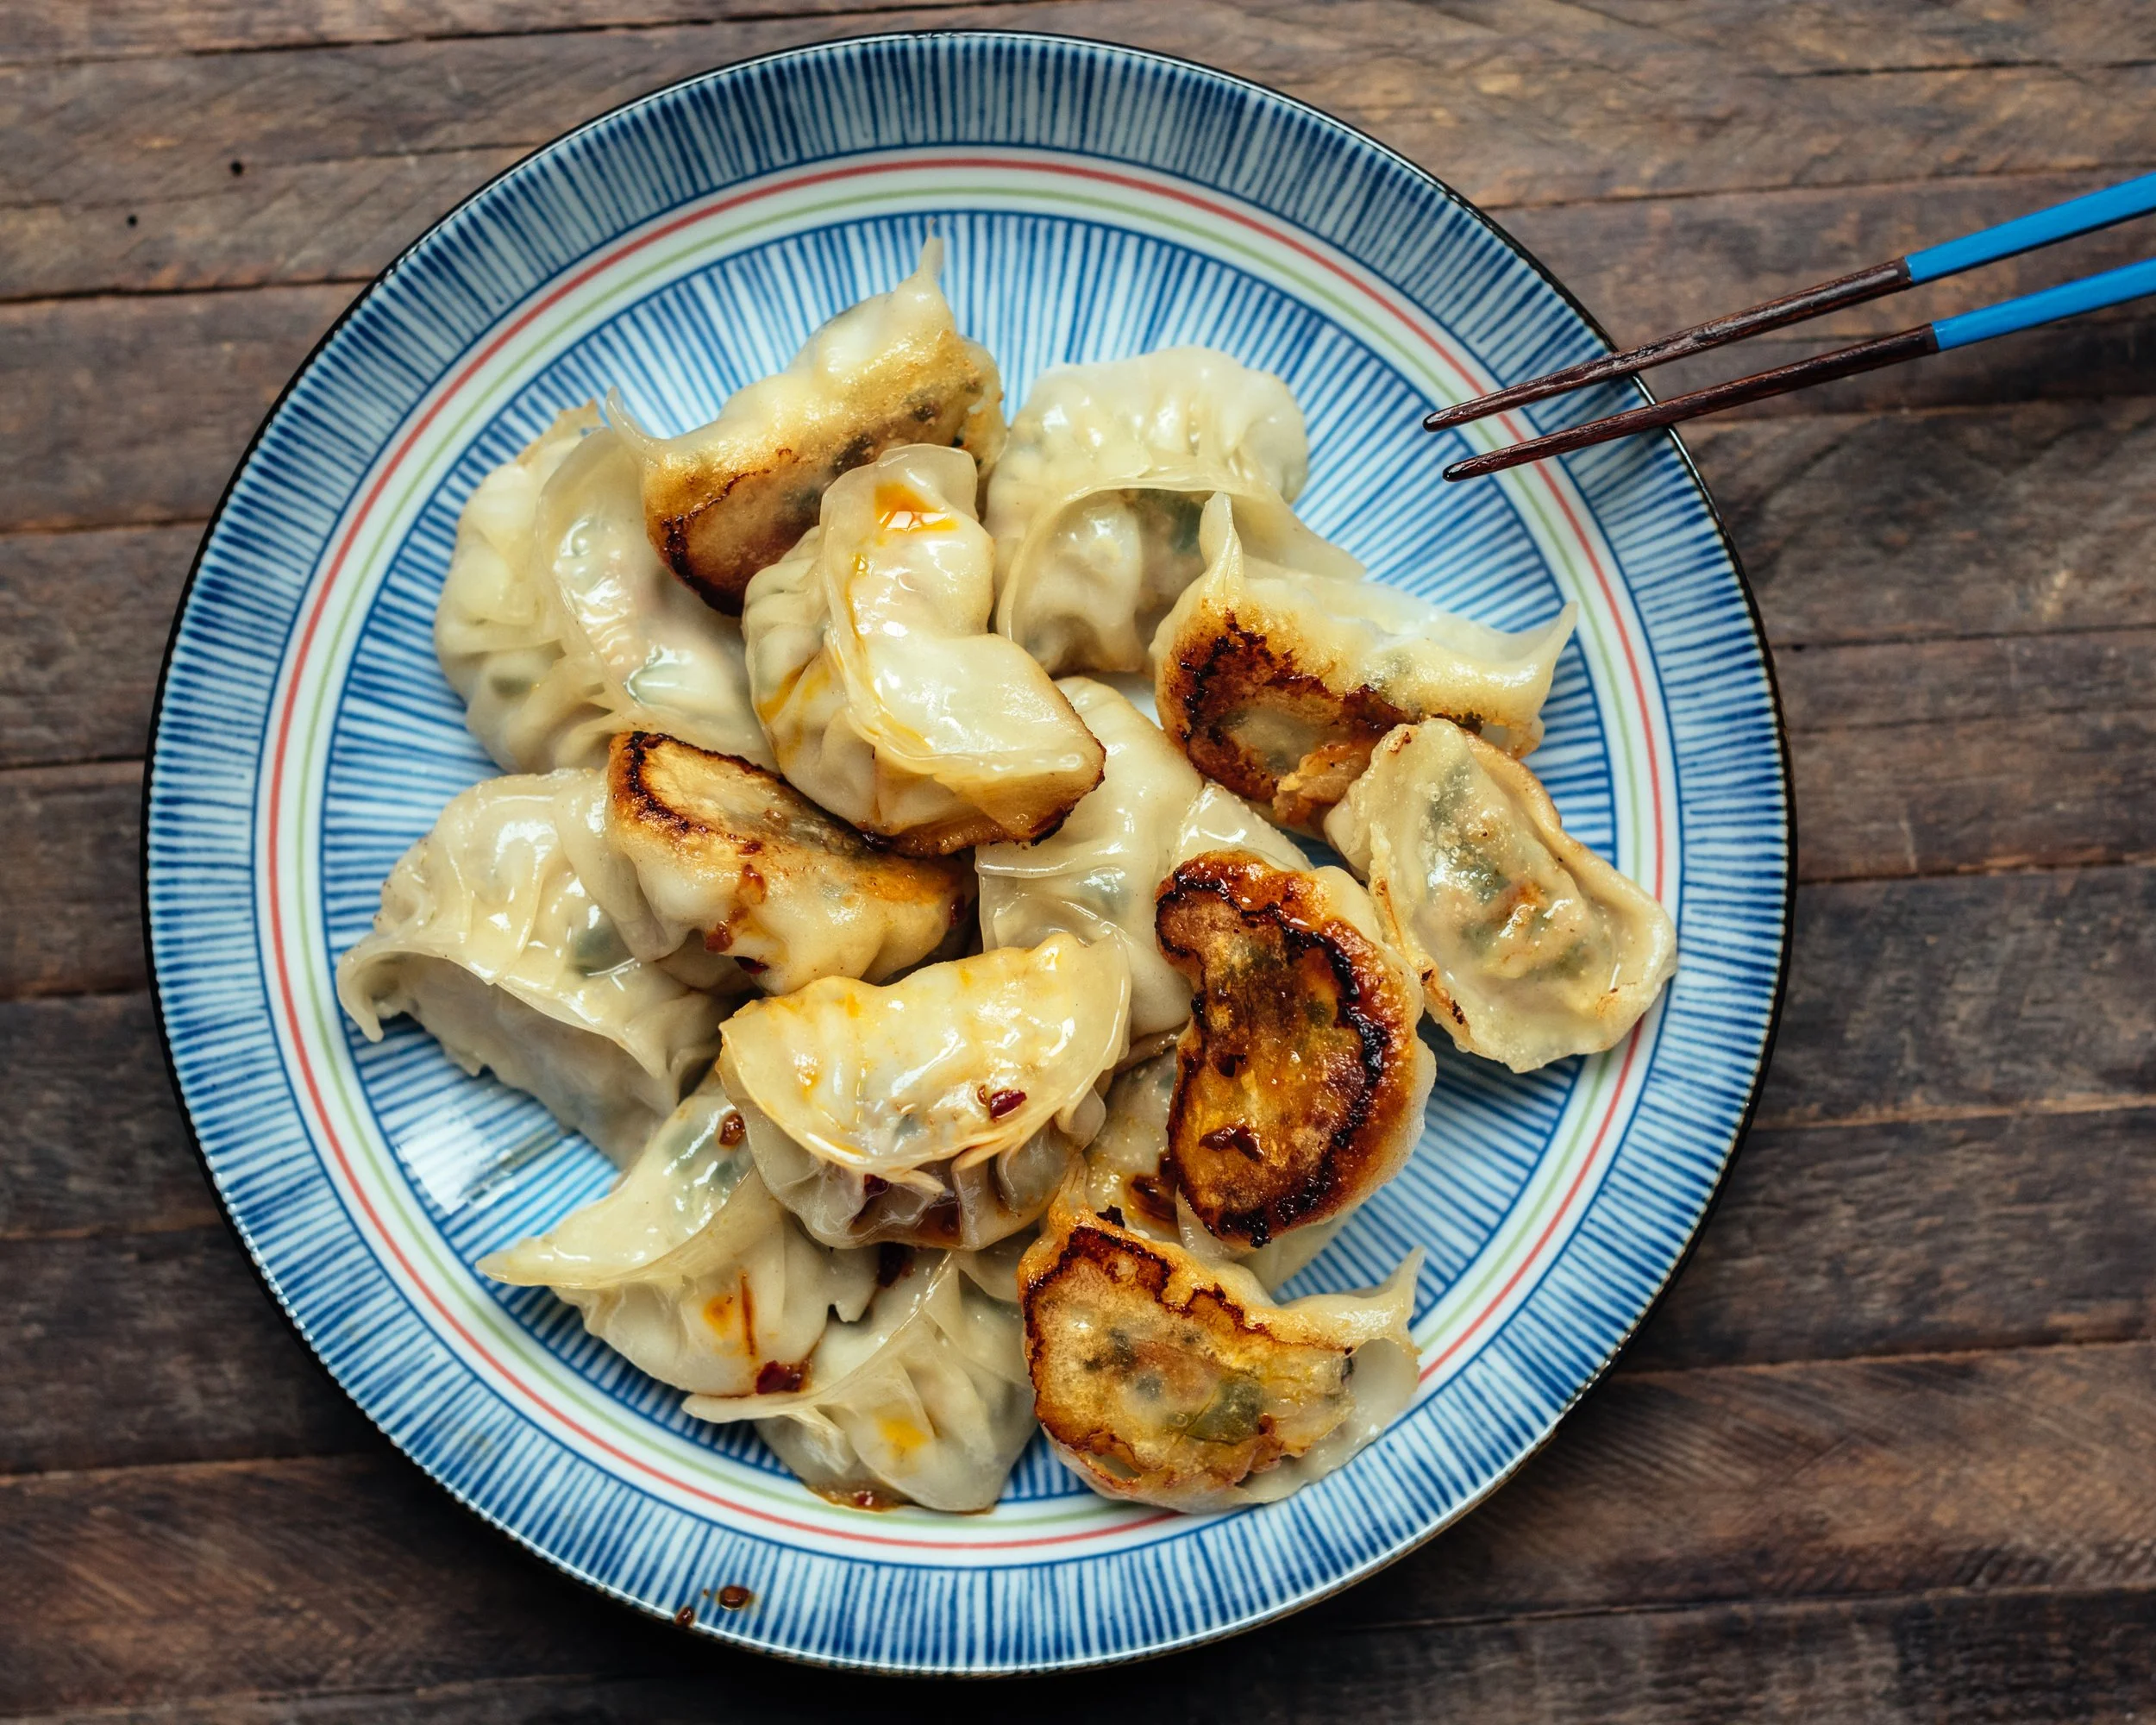
- Cook dumplings: I usually boil some and pan fry some. Boiling is the coziest and my go-to way to eat dumplings. Also, a practical benefit is you can boil a lot more dumplings at a time than pan-frying or steaming. The two methods are below:
- OPTION 1: BOILED DUMPLINGS: To boil, set a large pot of water to a rolling boil. Place dumplings in gently, one by one or a few at a time with the aid of a handled-strainer. You can cook as many as 30 dumplings at a time, provided your pot is large and they are not over-crowded. Stir dumplings around regularly to prevent sticking to the bottom or each other. Keep at a boil to cook until dough has become translucent, for a total cooking time of 5 minutes or so. Test a dumpling for doneness. The filling should be heated through and the dough slightly chewy, tender and not raw. Once done, strain and serve right away. BOIL FROM FROZEN: Once the dumplings have been added and the water comes back to a rolling boil, add 1 cup of cold tap water. Allow the water to come back to a boil and continue cooking for a total time of about 8-10 minutes or until cooked through, depending on how many dumplings are in the pot. If unsure, cut one in half to check that filling is piping hot and meat is no longer pink.
- OPTION 2: PAN FRIED DUMPLINGS: To pan fry, drizzle 1 tbsp oil into 10-11” non-stick skillet (it’s important that it be non-stick for this). Arrange dumplings in concentric circles in the pan, not touching. Pour 1 cup cold tap water all over the dumplings. Cover and turn heat to medium-high. Cook until water reaches a rolling boil and most of the water has evaporated (about 6-7 minutes). Reduce heat to medium and continue cooking until dumpling bottoms are golden and crispy. Serve right away. PAN FRY FROM FROZEN: Follow the same instructions as cooking them from fresh, except add 2-3 more minutes to total cooking time. If unsure, cut one in half to check that filling is piping hot and meat is no longer pink.
- Freeze dumplings: Place dumplings, not touching, on parchment lined baking tray and freeze that way for 1-2 hours or until solid. Transfer into zip top bag with air pushed out. Dumplings can be kept frozen well for about a month or so. See cooking instructions above for boiling or pan-frying from frozen.
Disclaimer: nutritional information is auto-generated and should only be used as an approximation.
Need a tutorial for wrapping dumplings? Master it by watching my video tutorial here:
How To Wrap Dumplings - Classic Pleats
If you tried this recipe, let me know how it went in the comments below. I’d love to hear about it!